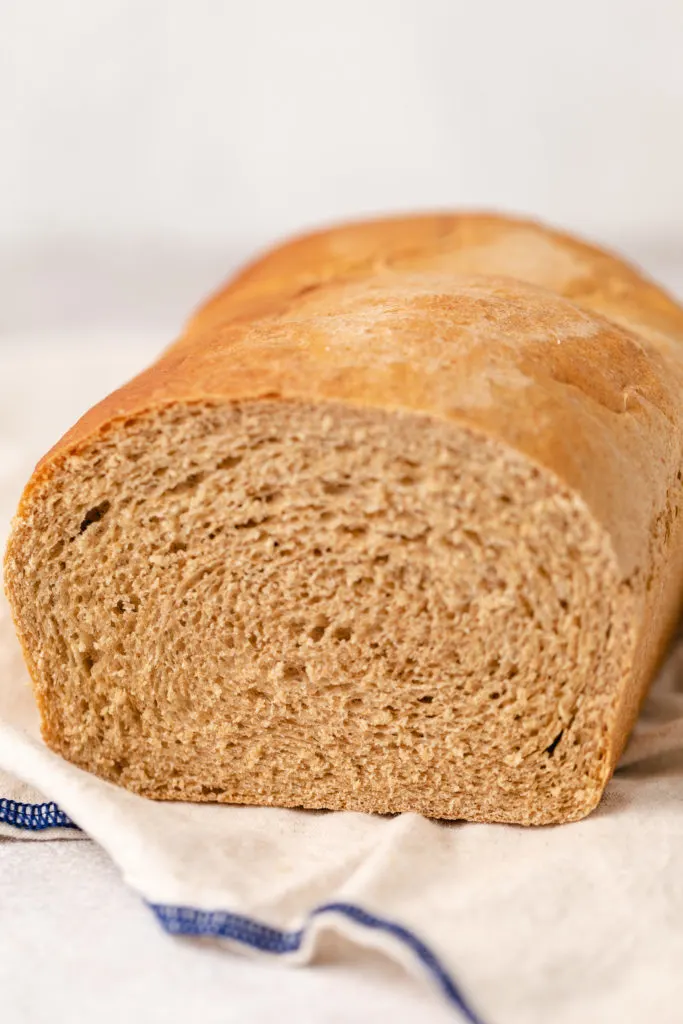
Soft Honey Wheat Bread


This Honey Wheat Bread Recipe is so simple and makes the best fresh bread! In just a handful of steps, you can make the softest wheat bread right in your own kitchen.
You may also love my dinner rolls and honey butter rolls.
Best Honey Wheat Bread Recipe
There really are few things better than a loaf of homemade bread. And this homemade honey wheat bread may just be the best one out there.
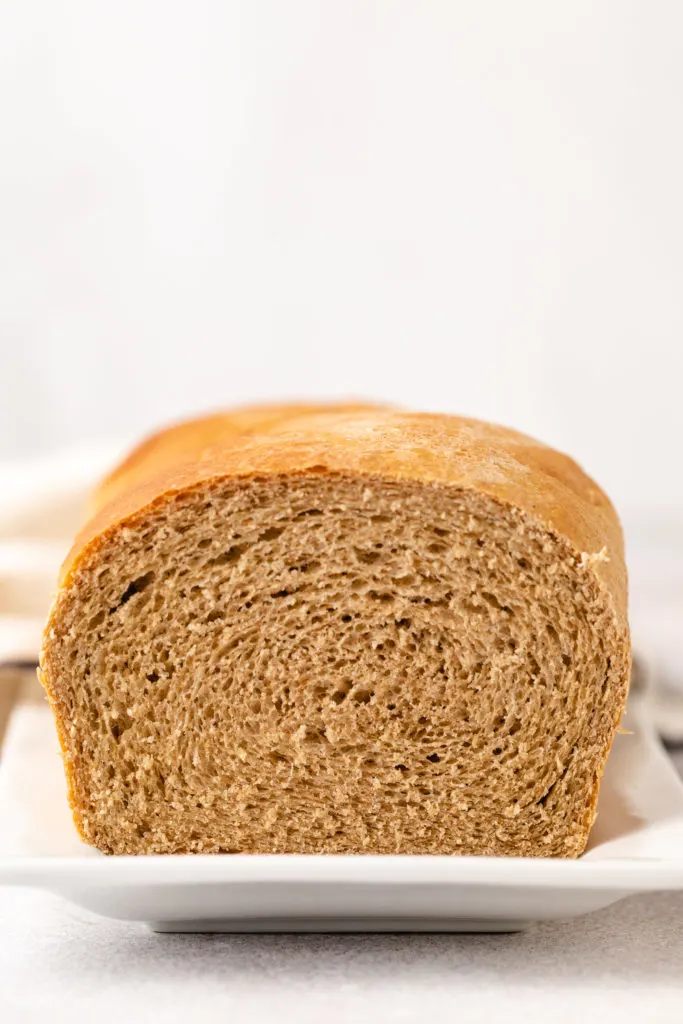
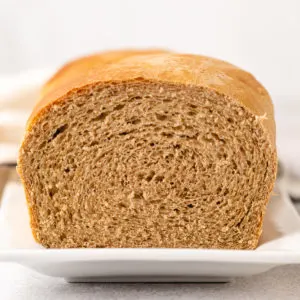
This homemade loaf is subtly sweet, so tender and soft, but still deliciously hearty. It requires just 15 minutes of prep, a few ingredients you probably already have in your kitchen, and a little bit of patience so the dough can rise.
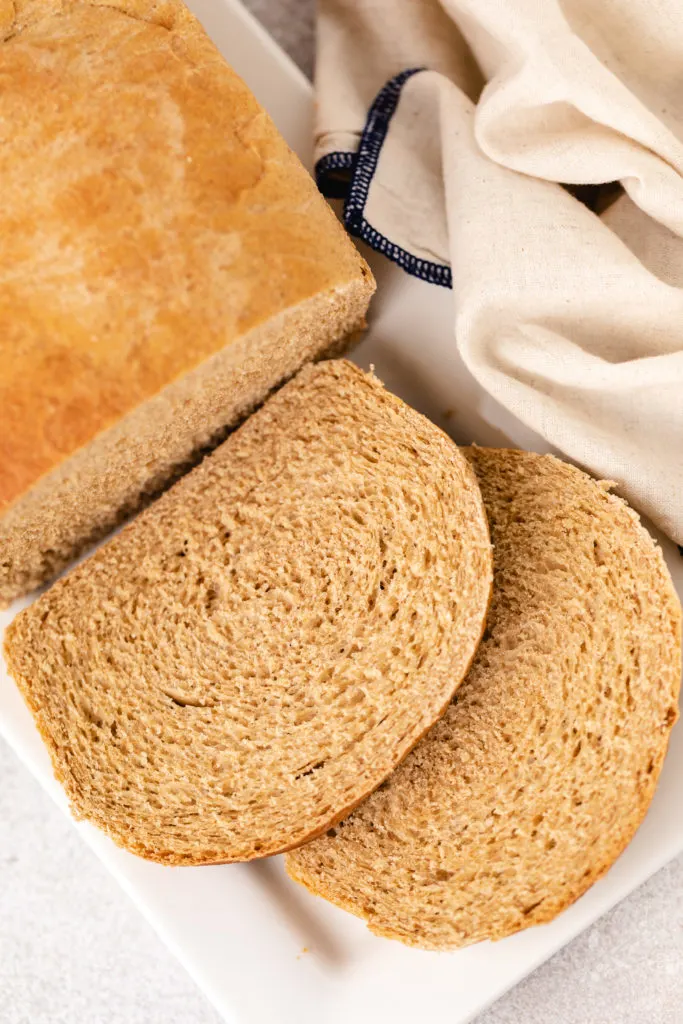
Dig into this honey wheat bread plain or serve it with your favorite spread or sandwich toppings.
Looking for more bread recipes? Try Rosemary Parmesan Bread or Sourdough Sandwich Bread.
How to Make Honey Wheat Bread
This honey wheat bread recipe is so good and so simple! The most time consuming part is waiting for the dough to rise. Here’s a breakdown of the recipe:
See the recipe card below for the ingredient amounts and full instructions.
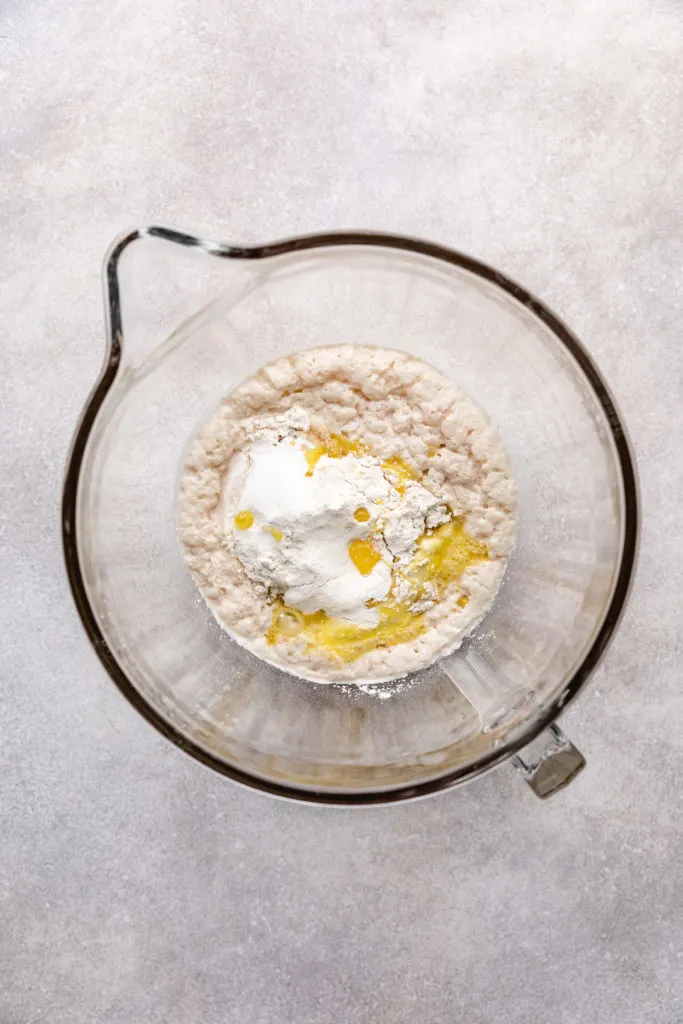
- In a bowl, mix together water, milk, yeast, and sugar until combined. Set aside and let sit for 10-15 minutes until foamy.
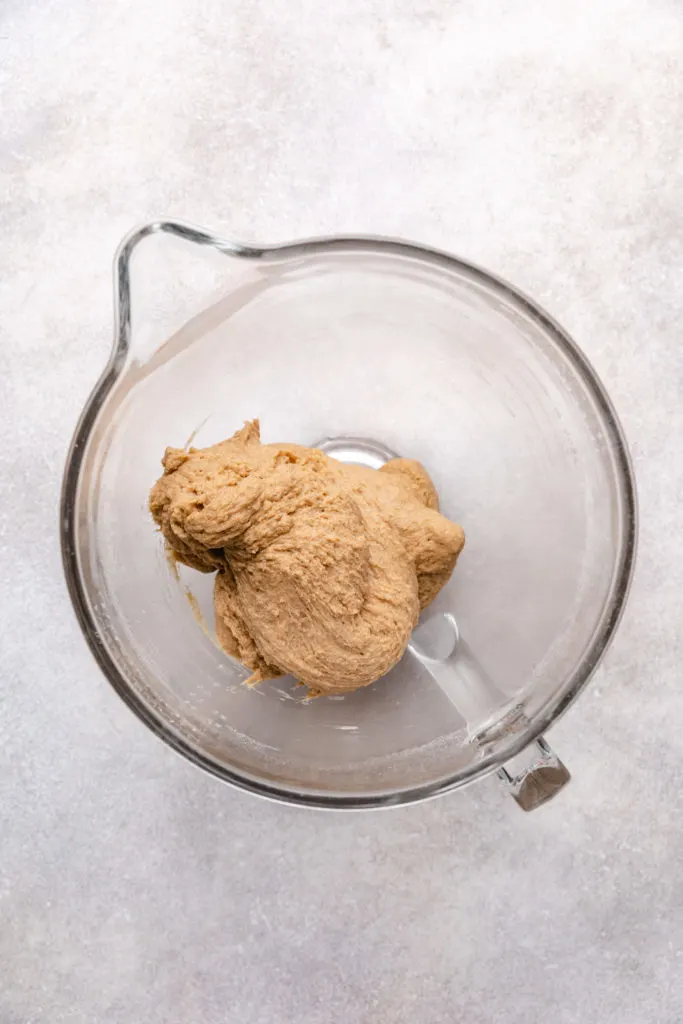
- Next, add 1 cup all-purpose flour, honey, oil, egg, and salt to the mixture. Use the dough hook of your stand mixer to mix until combined, then slowly add the remaining ⅓ cup all-purpose flour and the wheat flour. Mix for 5-7 minutes until the dough forms a cohesive ball.
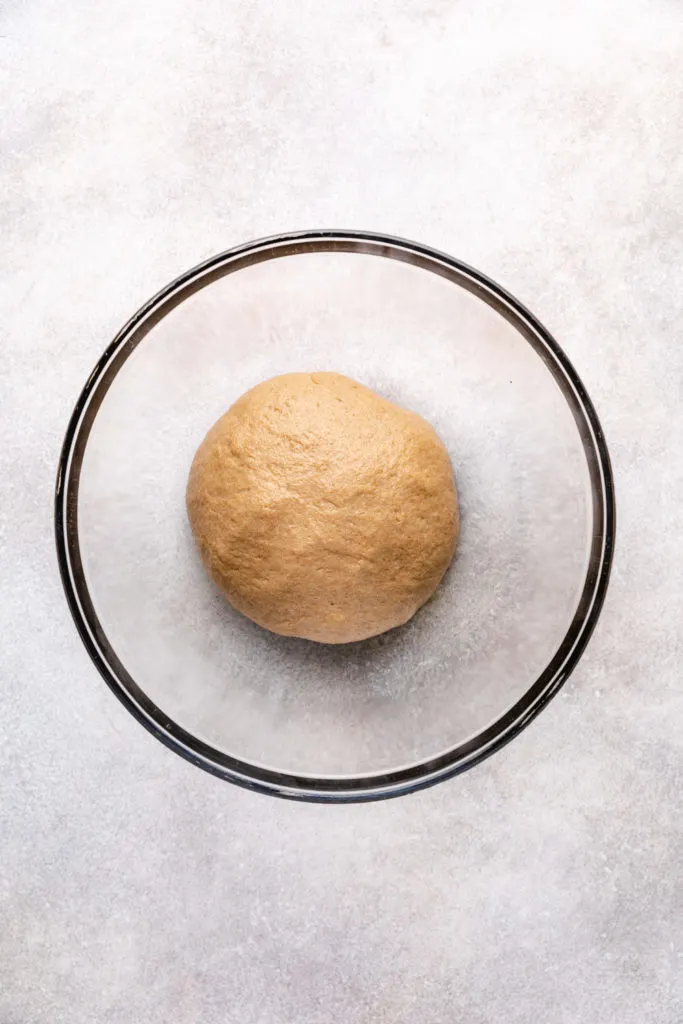
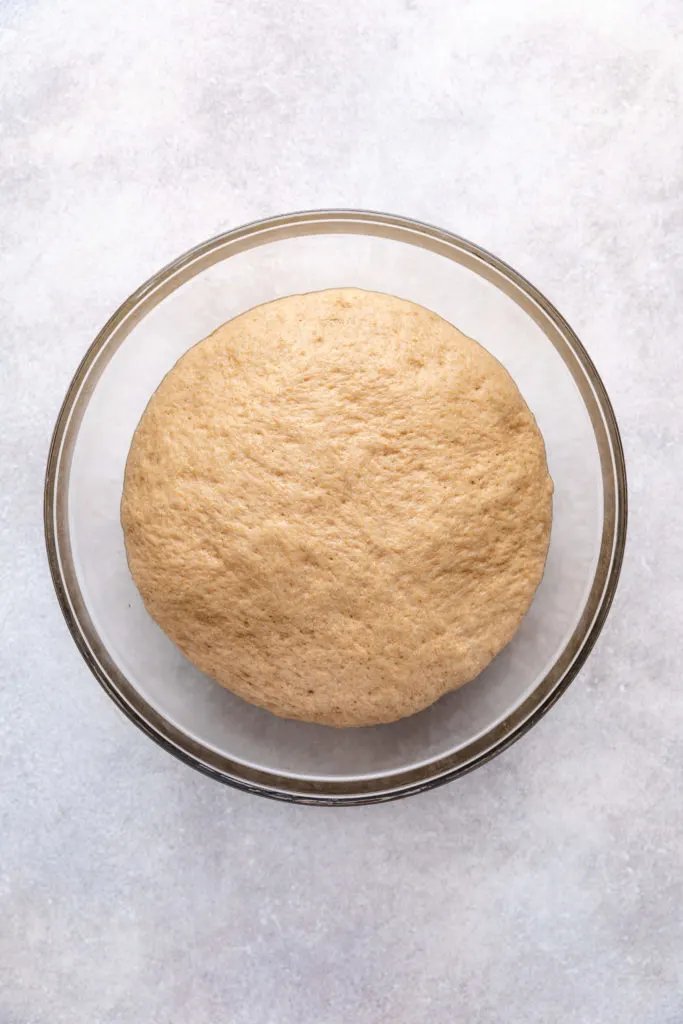
- Remove the dough from the bowl, form into a ball, then place into a large, greased bowl.
- Cover with plastic wrap and let rise for about 1 hour or until doubled in size.
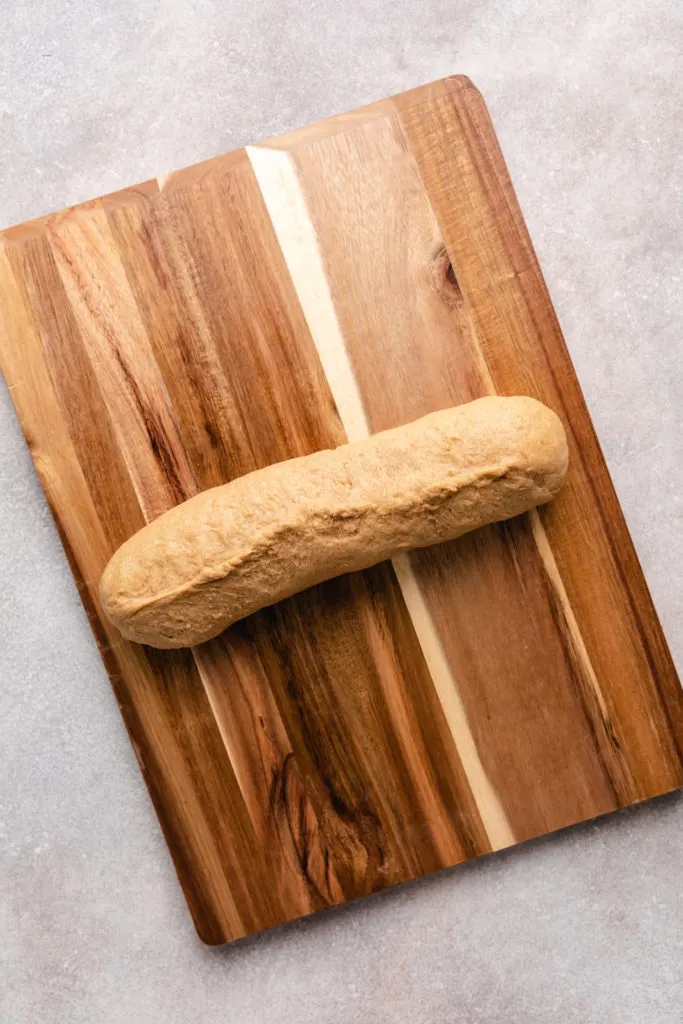
- Punch the dough down, turn it out onto a lightly floured surface, then roll it out into a large rectangle.
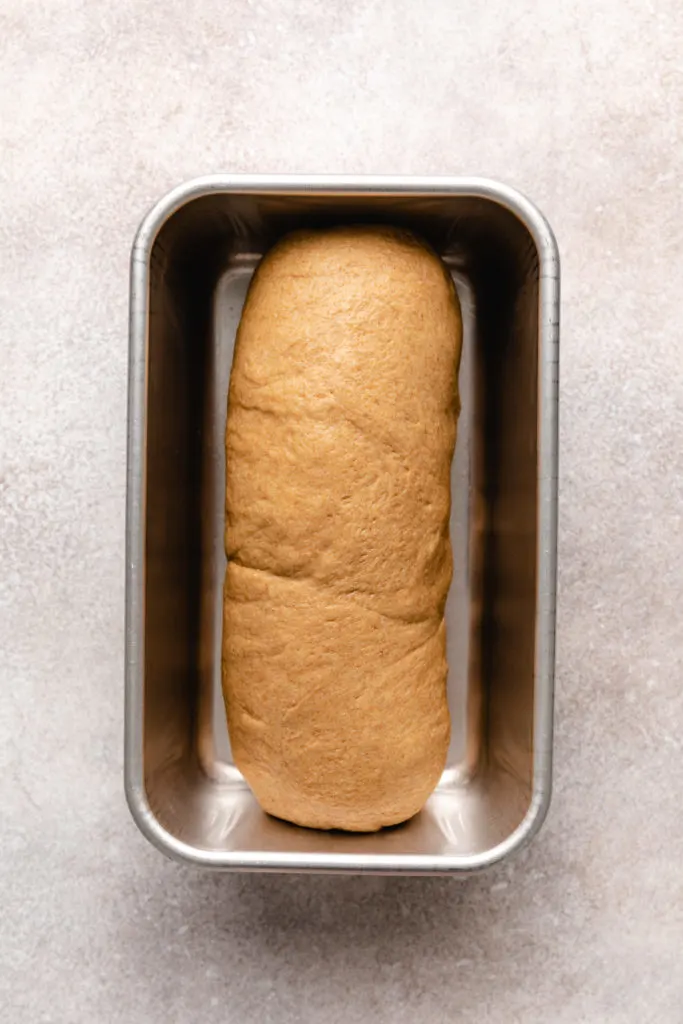
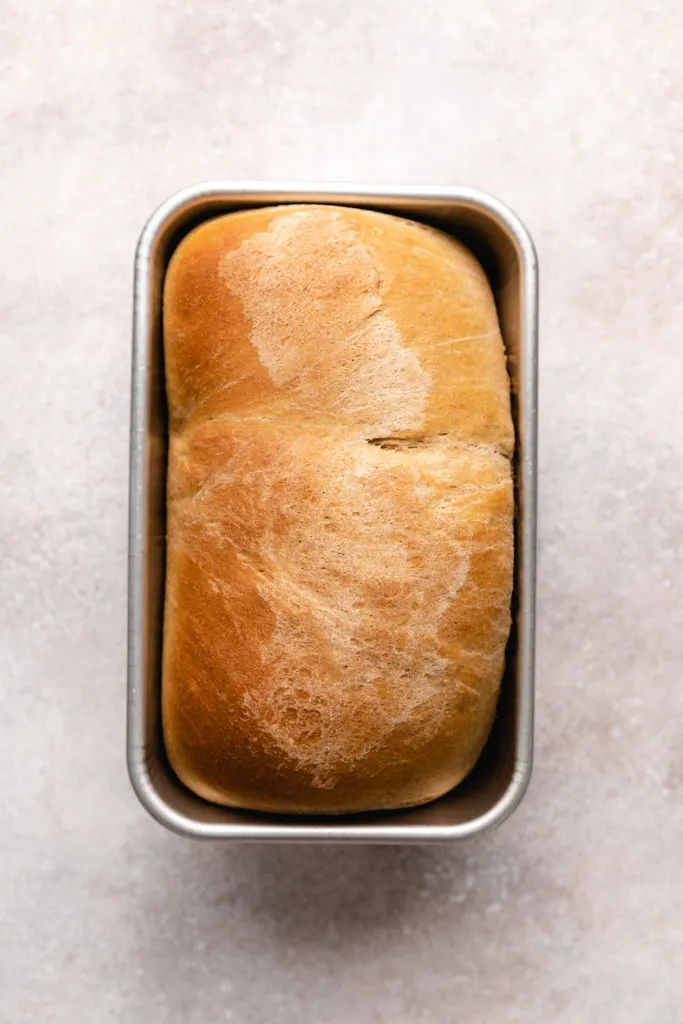
- Roll the rectangle up from the short end, pinch the seam together, then place into a greased loaf pan with the seam down.
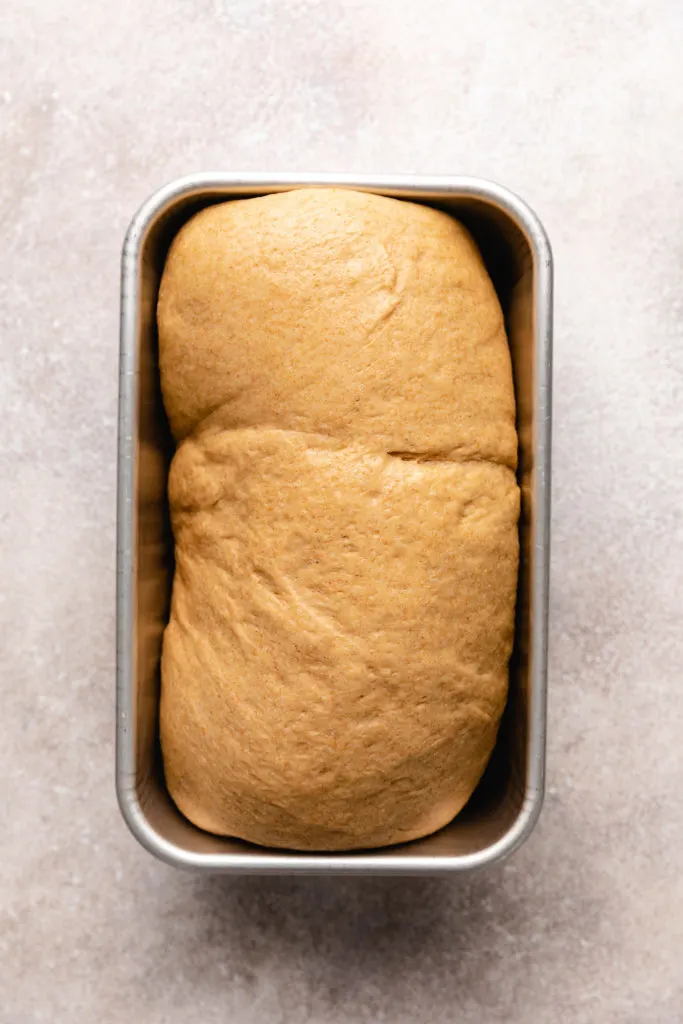
- Cover and let rise until it’s about 1 inch above the top edge of the pan.
- Remove the plastic, then bake the loaf at 350ºF for 30-35 minutes. Cool, then slice and serve.
Tips and Notes
- Warm the milk and water. Both ingredients should be in the 110-115ºF range. This is necessary to activate the yeast. If the yeast doesn’t activate properly, then the dough won’t rise like it should.
- Bring the egg to room temperature. Adding a cold egg to the yeast mixture can cause it to stiffen up which will affect the final texture of your bread.
- Use local raw honey, if available. The flavor is just unmatched! You can also use a flavored local honey to give each loaf a unique taste. We alternate between orange blossom, sawgrass, black mangrove, and wildflower varieties.
- Don’t add extra flour. This dough is stickier than most bread dough and will stick to the dough hook, mixing bowl, and your fingers. Do not compensate by adding more flour. That will make the loaf dry and dense. Instead, try adding a bit of olive oil or water to your hands. It makes the dough much more manageable.
- For a shiny top, mix together 1 egg and 1 tablespoon of water and brush that over the top of the dough before baking.
- For a delicious buttery finish, brush some melted butter over the top of the baked loaf. This is optional, but tastes delicious!
- The bread is finished baking when the internal temperature reaches 190°F.
How to Serve Honey Whole Wheat Bread
You can serve this honey wheat bread in any way you might serve regular sandwich bread.
Toast it and slather it with cinnamon butter, blueberry curd, or peanut butter, load it up with cranberry chicken salad or egg salad, or layer it with your favorite sandwich toppings for lunch.
It’s also delicious plain. You really can’t go wrong!
Storage
Room Temperature: Leftover honey wheat bread will last in an airtight container or plastic bag at room temperature for 2 days. I don’t recommend storing it in the fridge or keeping it longer than that as it will dry out the longer it sits.
Freezer: For longer storage, you can wrap the bread tightly in plastic wrap, then store it in the freezer for up to 3 months. When you’re ready to enjoy it again, simply thaw it at room temperature. Keep in mind that it may lose some flavor and texture the longer it sits in the freezer.
What’s the Difference Between Whole Wheat and Honey Wheat Bread?
The main difference between whole wheat and honey wheat bread is that honey wheat bread has added sweetness from the honey. Whole wheat bread, on the other hand, contains only whole wheat flour, while honey wheat usually has some all-purpose flour added to give it a lighter texture.
Does Honey Wheat Bread Taste Like Honey?
Honey wheat bread does have a little bit of sweetness from the honey. But, it’s subtle! It makes the bread taste delicious, but doesn’t overpower anything. You can still use it for your favorite savory sandwich.
Other Baked Good You May Love:
Like this recipe?
We’d love it if you would leave a 5 Star ⭐️⭐️⭐️⭐️⭐️ rating and comment below!
What You’ll Need
- ½ cup water, warmed to 110°F to 115°F
- ½ cup milk, warmed to 110°F to 115°F
- 2 ¼ teaspoon(s) active dry yeast
- 1 teaspoon(s) granulated sugar
- 1 ⅓ cups all-purpose flour
- ⅓ cup honey
- 2 tablespoons extra virgin olive oil, or other neutral tasting oil
- 1 large egg, lightly beaten; room temperature
- 1 teaspoon(s) salt
- 2 cups whole wheat flour
How to Make It
- Pour the water, milk, yeast, and sugar in the bowl of a stand mixer. Whisk briefly then let the mixture set undisturbed for 10 to 15 minutes until foamy and tan in color.½ cup water½ cup milk2 ¼ teaspoon(s) active dry yeast1 teaspoon(s) granulated sugar
- Add 1 cup of all-purpose flour, honey, olive oil, egg, and salt. Use the dough hook and mix until combined. Then slowly add the remaining ⅓ cup of all-purpose flour and 2 cups of wheat flour.⅓ cup honey2 tablespoons extra virgin olive oil1 large egg1 teaspoon(s) salt2 cups whole wheat flour
- Mix on the second mixer speed for 5 to 7 minutes until the dough forms a cohesive, small ball. It should pull away from the top and sides of the bowl but will stick to the bottom of the bowl. The dough will be sticky to the touch.
- Remove the dough from the bowl, and form into a ball. Place it in a large, greased bowl and cover with plastic wrap. Allow the dough to double in size, about 1 hour.
- Punch down the dough to deflate it and turn out onto a lightly floured surface.
- Use a rolling pin to roll the dough into a large rectangle, about 8×12-inches. Roll from the short end and pinch the seam together. Place the dough in a greased 9×5-inch loaf pan, seam side down.
- Cover the pan with greased plastic wrap and allow the dough to rise until it’s about 1 inch above the edge of the pan.
- Remove the plastic wrap, and bake at 350°F for 30 to 35 minutes.
- Allow the bread to cool in the pan for 10 to 15 minutes before transferring to a wire rack. Cool completely before slicing.
- Scroll up and see the post for tips, FAQs, and storage options.
Notes
Nutrition
Meet Kim
Hi, I’m Kim Vargo! I love making scratch-made desserts and classic dinners that bring back a little nostalgia. Whether it’s a stovetop meal or a simple pasta bake, I’m all about good food made without the extra fuss.