Italian Bread Recipe
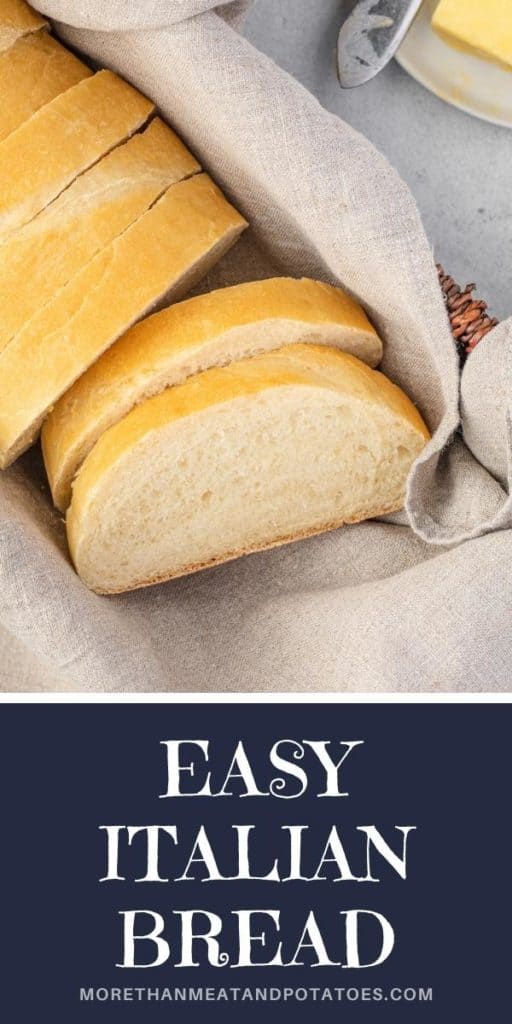
If you love the taste of Italian Bread and want to make it from scratch, this recipe is for you! You will be amazed at how easy it is to create this classic for sandwiches, croutons, or for anytime you need delicious homemade bread.
Despite what it may seem like, making your own bread from scratch is pretty simple! A homemade bread uses few ingredients, it is inexpensive to make, and it can be done in a short time frame.
Best of all, it doesn’t contain any of the preservatives, artificial flavors, or other additives found in most store-bought bread.
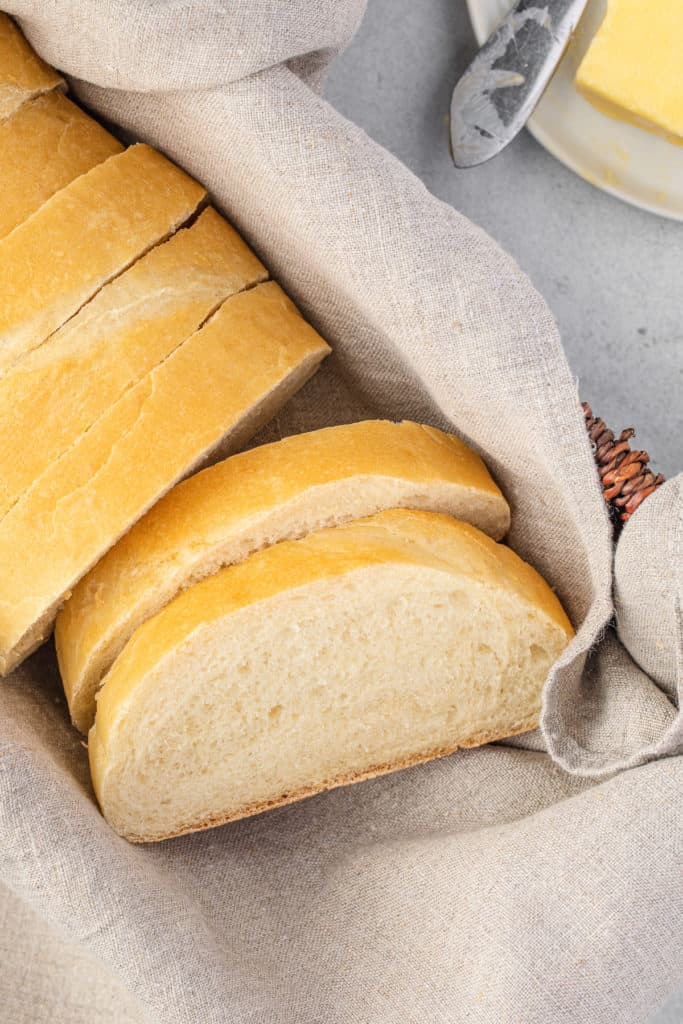
This recipe for Italian bread makes two delicious loaves using flour, sugar, water, yeast, egg white, and a bit of oil. Once everything is properly mixed and proofed, bake it in the oven for a warm and delicious loaf of Italian bread.
Use this Italian bread for sandwiches, serve it with a bowl of Italian Wedding Soup or Ham and Potato Soup, or make homemade croutons. It makes delicious garlic toast and it great dipped in Spaghetti Sauce, too!
How To Make Italian Bread From Scratch
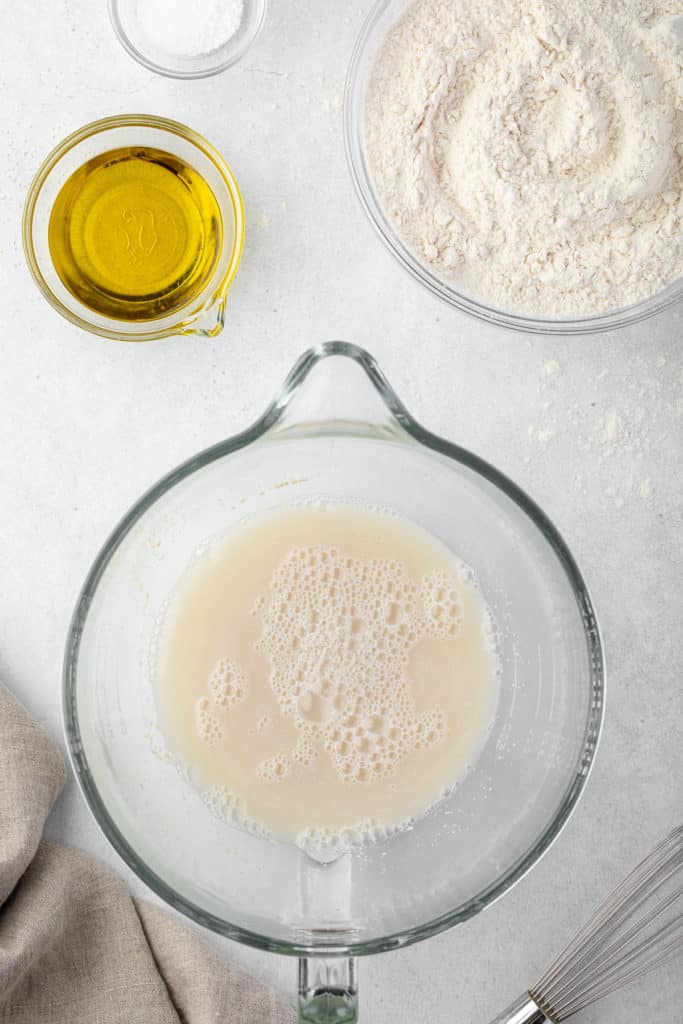
- Activate the yeast: Place yeast, warm water, and granulated sugar in a large mixing bowl, and stir to combine. Allow the mixture to rest for 5-10 minutes until the mixture is tan and has bubbles forming.
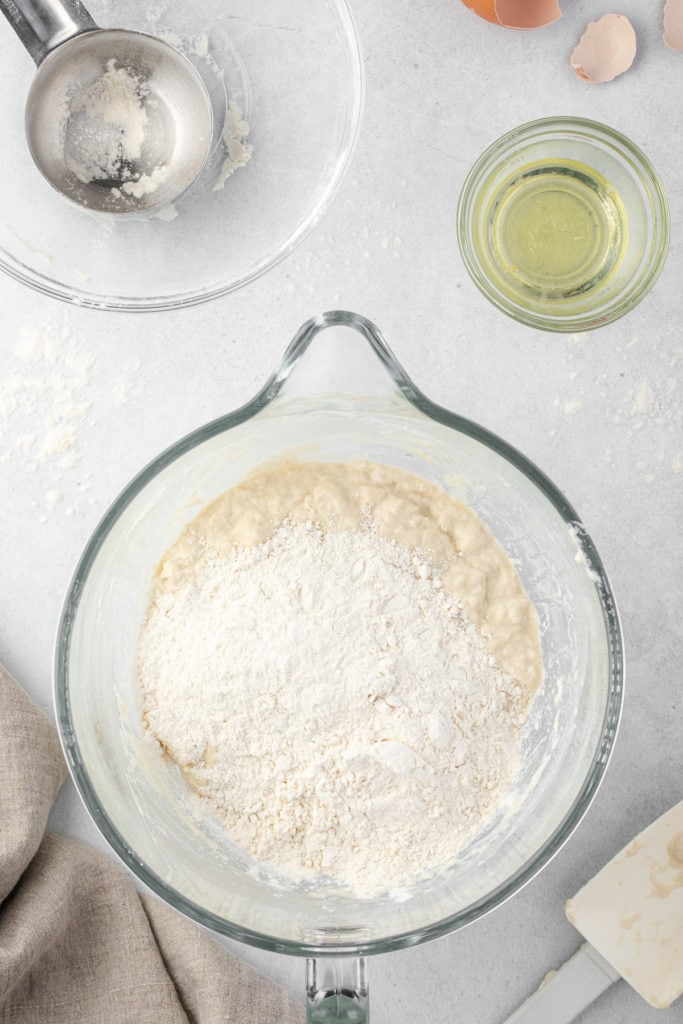
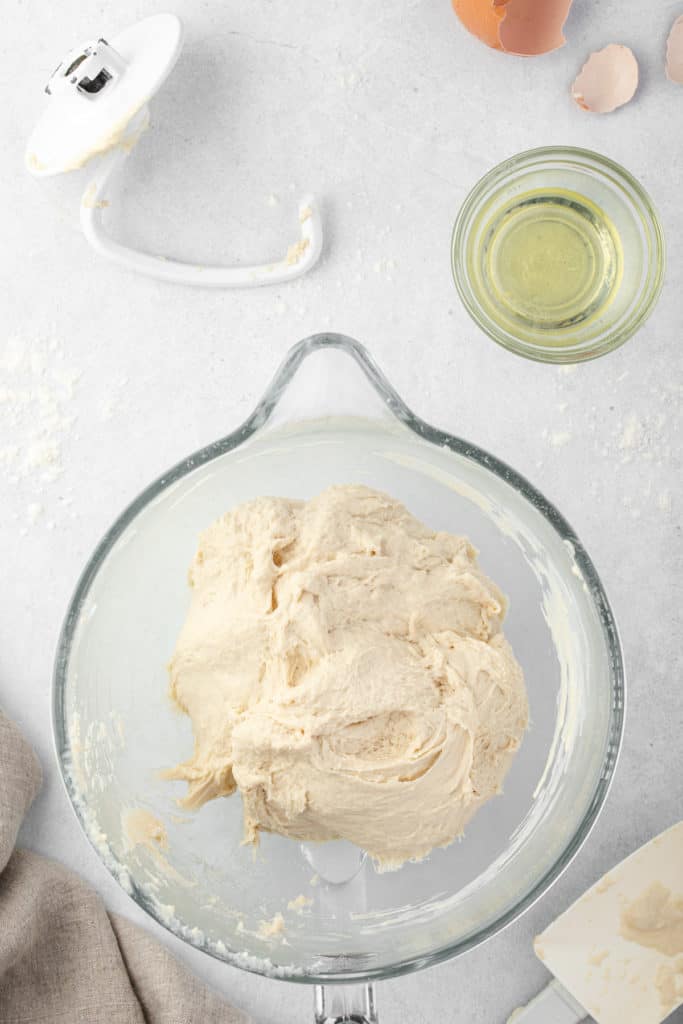
- Add the dry ingredients: To the yeast mixture, add the olive oil, salt, and about 3 cups of bread flour to start. Mix on low speed using the dough hook. You could also fold by hand using a large spatula, until fully mixed. Then, add the remaining flour a little at a time until the dough is tacky but not too sticky. You may not need all the flour, so don’t dump it all in at once.
- Knead the bread dough: You can knead the dough using an electric mixer on level two speed. This should take about 5 minutes. If you don’t have an electric mixer, knead by hand for about 7-8 minutes.
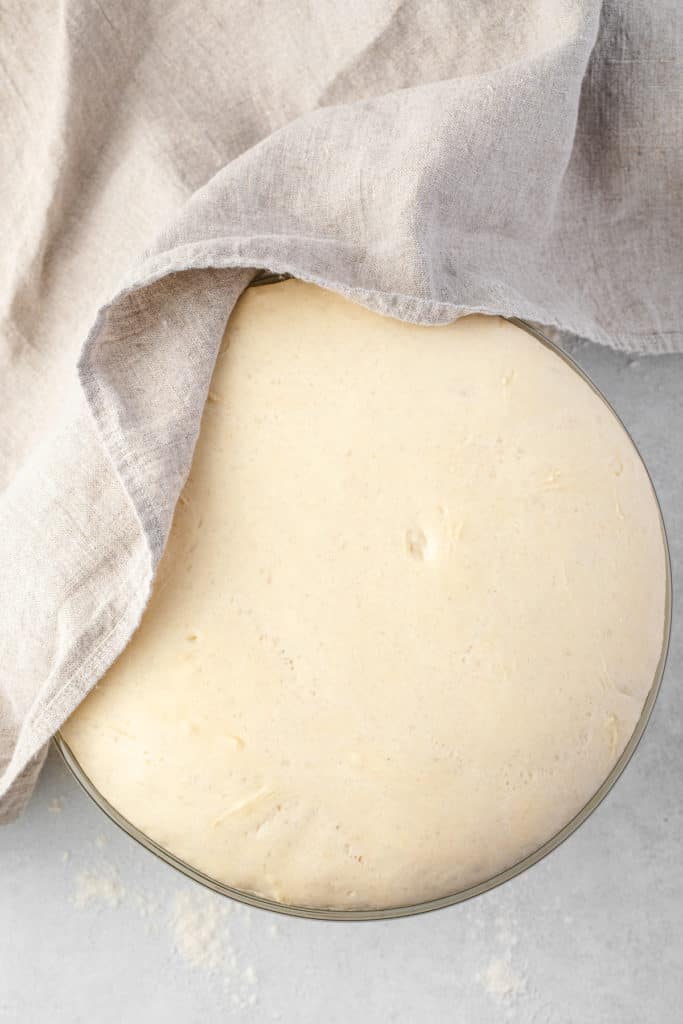
- Proof the dough: Add the dough to a large bowl that has been greased with olive oil. Cover, and let it rest in a warm place until it doubles in size. This should take about 1 hour.
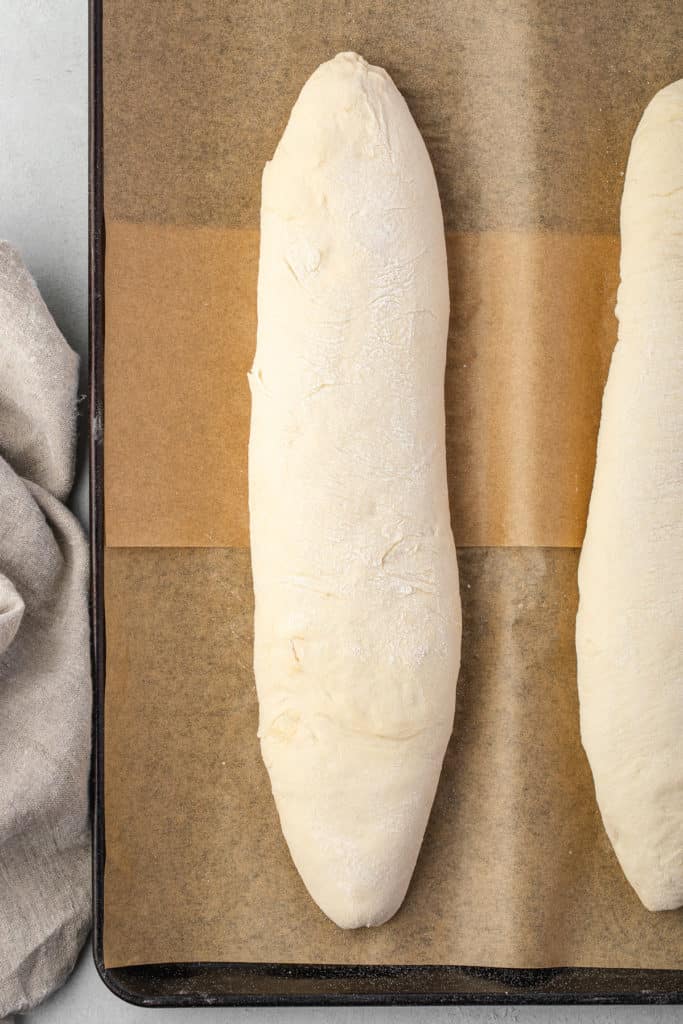
- Assemble the bread loaves: Once the dough has doubled in size, punch it down, then divide it into two even pieces. Roll each loaf into a 12-inch rectangle then fold lengthwise until it’s 3 inches in width. Add to a parchment-lined baking sheet, then pinch the ends to create a torpedo shape.
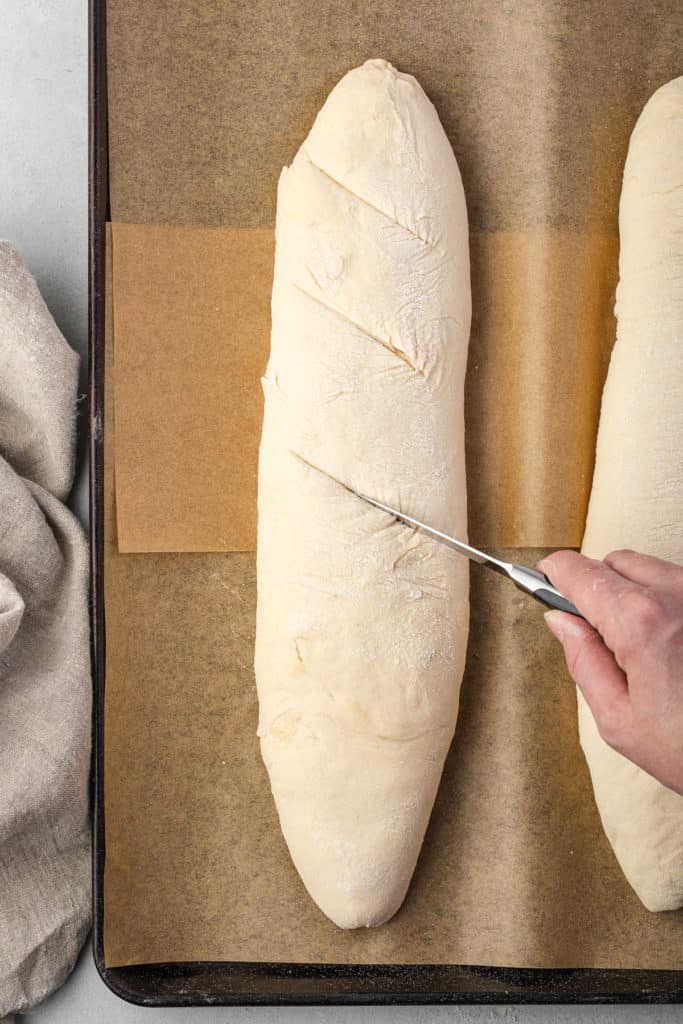
- Proof again: Add 4-5 sharp slashes into the top of the dough, then cover and let it rise for an additional 30 minutes or until the loaves have doubled in size once again.
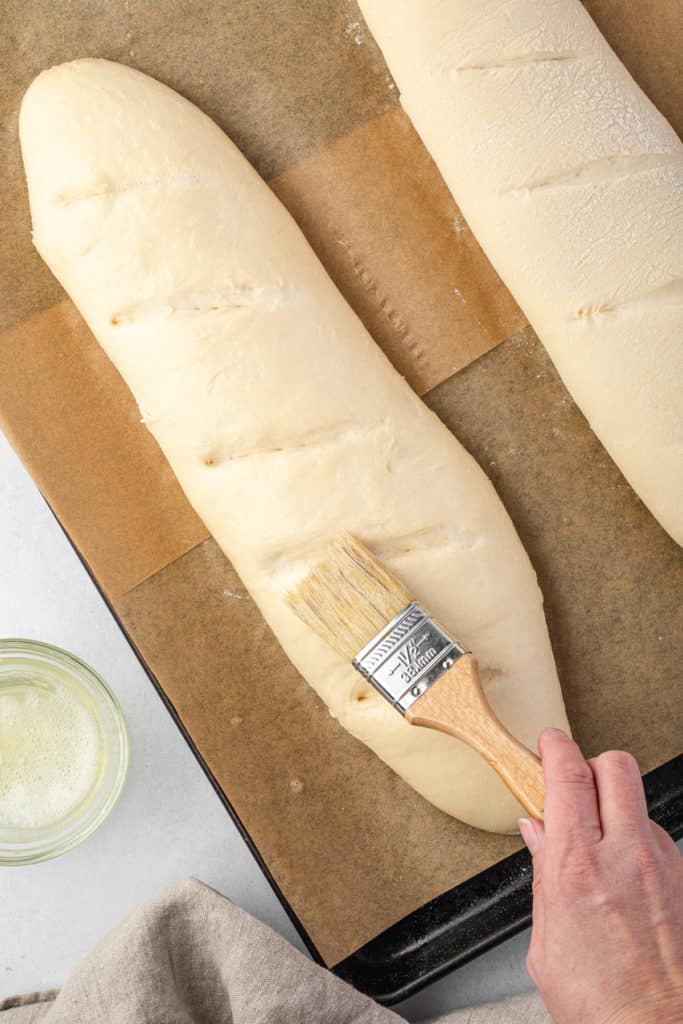
- Prepare for baking: At this time, preheat your oven to 400°F. Create an egg wash by whisking the egg white with water. Brush the egg wash over the top of each bread loaf.
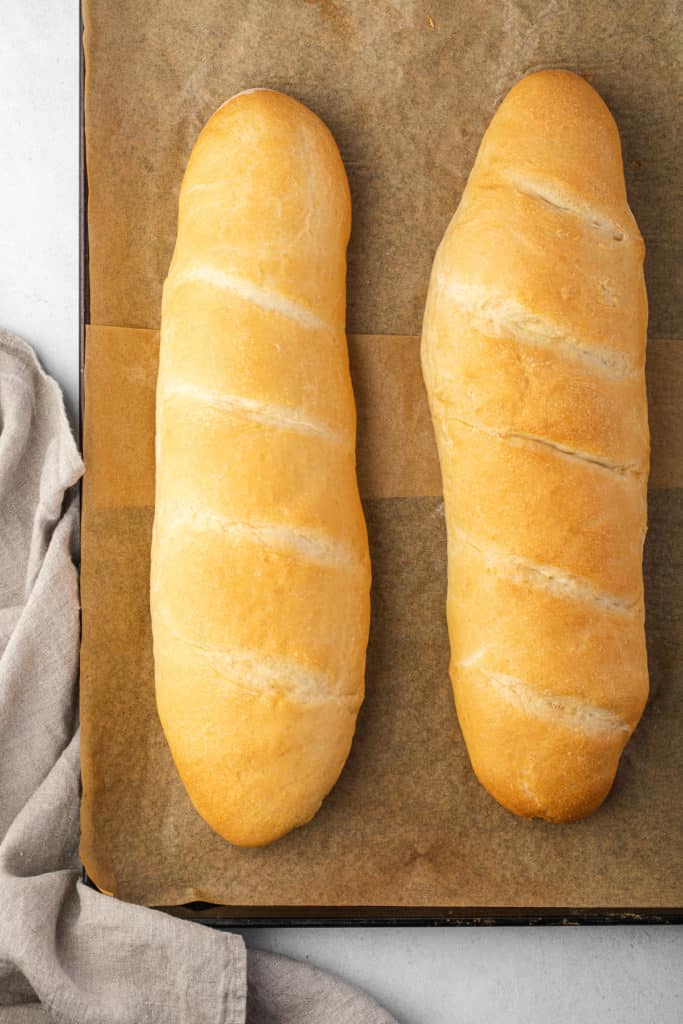
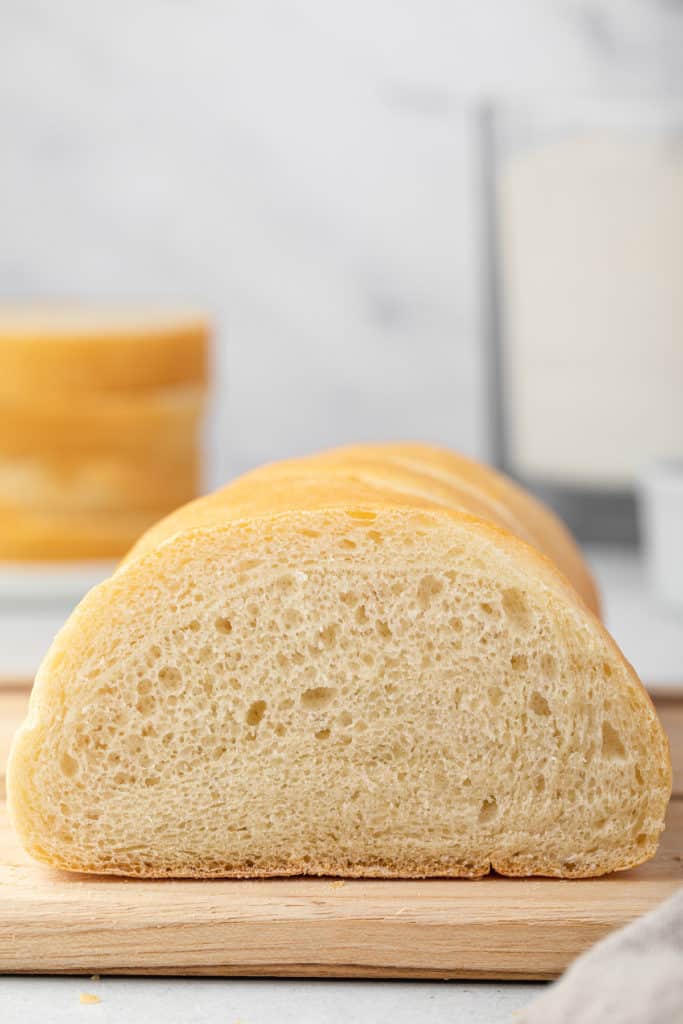
- Bake the bread: Bake in the preheated oven for 25-30 minutes or until the outside is a golden brown color. Let it cool completely before slicing and serving.
Recipe Tips
- When choosing the yeast for this recipe, make sure it is instant variety and also make sure that it is not expired as expired yeast won’t work.
- When it comes to the water temperature it should be warm but not hot as it could kill the yeast and your dough won’t rise. Water that is too cold will take longer for it to activate or it just may never happen.
- Make sure you use bread flour instead of all-purpose flour, it makes a big difference in the texture and taste of Italian bread.
- Egg wash is optional but recommended as it will give the bread a nice golden brown color when it bakes.
- If you don’t have an electric mixer, kneading by hand is totally doable and it just might take a little longer.
Variations
- To the dough, add some dried Italian herbs such as oregano, thyme, basil, or rosemary.
- Add in some chopped olives for an Italian olive bread recipe.
- Mix it up with your favorite cheese such as parmesan and mozzarella to enjoy it with spaghetti or lasagna recipes.
- Toss in sundried tomatoes for a rich tomato taste that is naturally sweet.
Why do you cut slashes in the bread dough?
As the dough rises it will push on the weakest part of the dough. By lashing the dough you control where that happens and it gives you a prettier loaf.
Can I freeze the extra loaf?
Yes, wrap the extra loaf of Italian bread in plastic wrap and then place it in a freezer bag or wrap again with plastic wrap and then a layer of aluminum foil.
How does humidity impact the amount of flour that I need?
When the air is more humid it adds moisture to your flour. So you may need to add extra flour when baking in the summer months and use less flour during the dry winter weather.
How to Store and Freeze Italian Bread
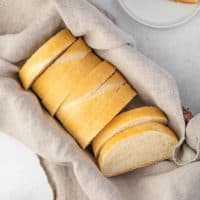
Storing: To store freshly baked Italian bread, it’s best to keep it on the countertop in an airtight container or a bread bag. It will stay good for up to three days. Make sure that’s it’s completely cool before adding it to a storage container.
Freezing: To freeze it, allow it to cool completely then wrap it tightly with plastic wrap and then a layer of aluminum foil and store it in the freezer for up to two months. The plastic wrap helps to prevent it from freezer burn. When it comes to freezing bread, it’s best to slice it before you freeze it so that when it thaws out it will be ready to eat.
Reheating: To reheat Italian bread, wrap it in a damp paper towel and place it on a microwaveable plate then heat it for 30 seconds or until it’s hot.
More Bread Recipes to Try
- Greek Flatbread
- Cinnamon Twist Bread
- Bread Pudding with Rum Sauce
- Skillet Cornbread
- Pumpkin Bread Pudding
What You’ll Need
- 4 ½ teaspoons active dry yeast, or 2 standard packages
- 2 cups (454 mL) warm water, warmed to 100-110°F
- 1 tablespoon granulated sugar
- ¼ cup (50 mL) olive oil, plus additional oil for the bowl
- 1 tablespoon salt
- 5-6 cups (600-720 g) bread flour
- 1 egg white, optional
- 1 tablespoon cold water, optional
How to Make It
- Place yeast, warm water, and granulated sugar in a large mixing bowl, and stir to combine. Allow the mixture to rest for 5-10 minutes until tan and frothy. Bubbles should form on the surface of the mixture.4 ½ teaspoons active dry yeast2 cups (454 mL) warm water1 tablespoon granulated sugar
- Add the olive oil, salt, and 3 cups (360 grams) of bread flour. Mix on low speed using the dough hook, or fold by hand using a large spatula, until the flour is completely mixed in.¼ cup (50 mL) olive oil1 tablespoon salt5-6 cups (600-720 g) bread flour
- Add the remaining flour and mix until only a small amount of flour remains visible. If the dough is sticky add additional flour. It should be tacky, but not overly sticky. (When you press into it, only a speck should stick to your finger.)
- If using an electric mixer, adjust to level 2 speed for 5 minutes. Alternatively, you can turn the dough onto a well-floured surface and knead by hand for 5 minutes.
- Transfer the dough to a large bowl that has been rubbed with olive oil. Cover and allow to rest in a warm, dry place for 1 hour, or until the dough doubles in size.
- Punch down the dough and divide into two balls. Roll each dough into a rectangle that is about 12 inches in length. Fold lengthwise in thirds to make one long and thin rectangle, about 3 inches in width.
- Turn the dough over onto a parchment-lined baking sheet. Pinch the ends of the dough shaping it into points on each end similar to a torpedo shape.
- Using a sharp knife cut 4-5 slashes into the dough. Cover and let rise for 30 minutes or until noticeably puffy and doubled in size a second time.
- Preheat the oven to 400°F.
- In a small bowl, whisk the egg white with cold water. Use a pastry brush to gently brush the egg wash over the bread dough.1 egg white1 tablespoon cold water
- Bake in the oven for 25-30 minutes, or until golden brown. Remove from the oven and cool completely before slicing. See post for storage options.
I’ve made this recipe probably at least a dozen times now and it’s always delicious. Perfect for garlic bread, sandwiches, or just a bit of butter!!
Thank you Lexie! We appreciate your comment and rating the recipe card. Also, we’re thrilled you enjoy the Italian bread. Thank you again and have a lovely day 🙂
I love the way this recipe is written. No need to scroll back to the ingredient list!
Thank you Katherine! We try to make things as easy as possible for our readers 🙂
I haven’t even baked the bread yet and can already tell it’ll be amazing !! It feels perfect and you know what I mean by how it feels. It’s a wonderful fluffy dough and yes , I too love the details under each step with the measurements!!! We all know how annoying it is to keep jumping back in the recipe to see the measurements as we go yet here we don’t have to and that is a brilliant idea !! I can’t wait for the rise so I can bake this one . I know it’s going to be fabulous already !
Thanks so much, Linda! Yes, I know exactly what you mean about how the dough feels. You’ll know how the bread will turn out before the first rise just by the feel. It’s one of my favorite things about yeast bread.
Thank you for the feedback regarding the ingredients being listed beneath the instructions. We’re glad that’s helpful. We hope you enjoy the bread and have a wonderful weekend! 🙂
Love your details under each step, I don’t have to scroll up and down for ingredients. Nice and easy to make.
Thanks so much for the feedback, Patricia! We’re so happy that’s helpful. Have a fantastic weekend! 🙂
Thank you for such detailed instructions. This was my second attempt today after failing spectacularly with another blogger’s recipe. It really helps to know what I should be looking for in consistency as well as feel. Bread making is a nuanced process and having this info is critical when trying something new.
Also I like the way you have the measurements of ingredients highlighted under each step. So often when I’m on my phone in the kitchen I have to scroll back up to remember how much flour or salt or what have you. This added bonus makes it much easier to follow along.
I could tell this would be a winner before I even baked, what a beautiful dough! So glad I started over and found this recipe. I’ll be back for more!
Thank you so much for your comments and rating the recipe. Kimberly and I appreciate it. Furthermore, we’re happy to hear that our bread recipe worked as intended. Thank you again for your thoughtful comments and we wish you a lovely weekend 🙂