Rosemary Parmesan Bread

Soft, cheesy, and packed with herby flavor, this rustic rosemary parmesan bread bakes to perfection in a Dutch oven with a crispy crust and fluffy interior.
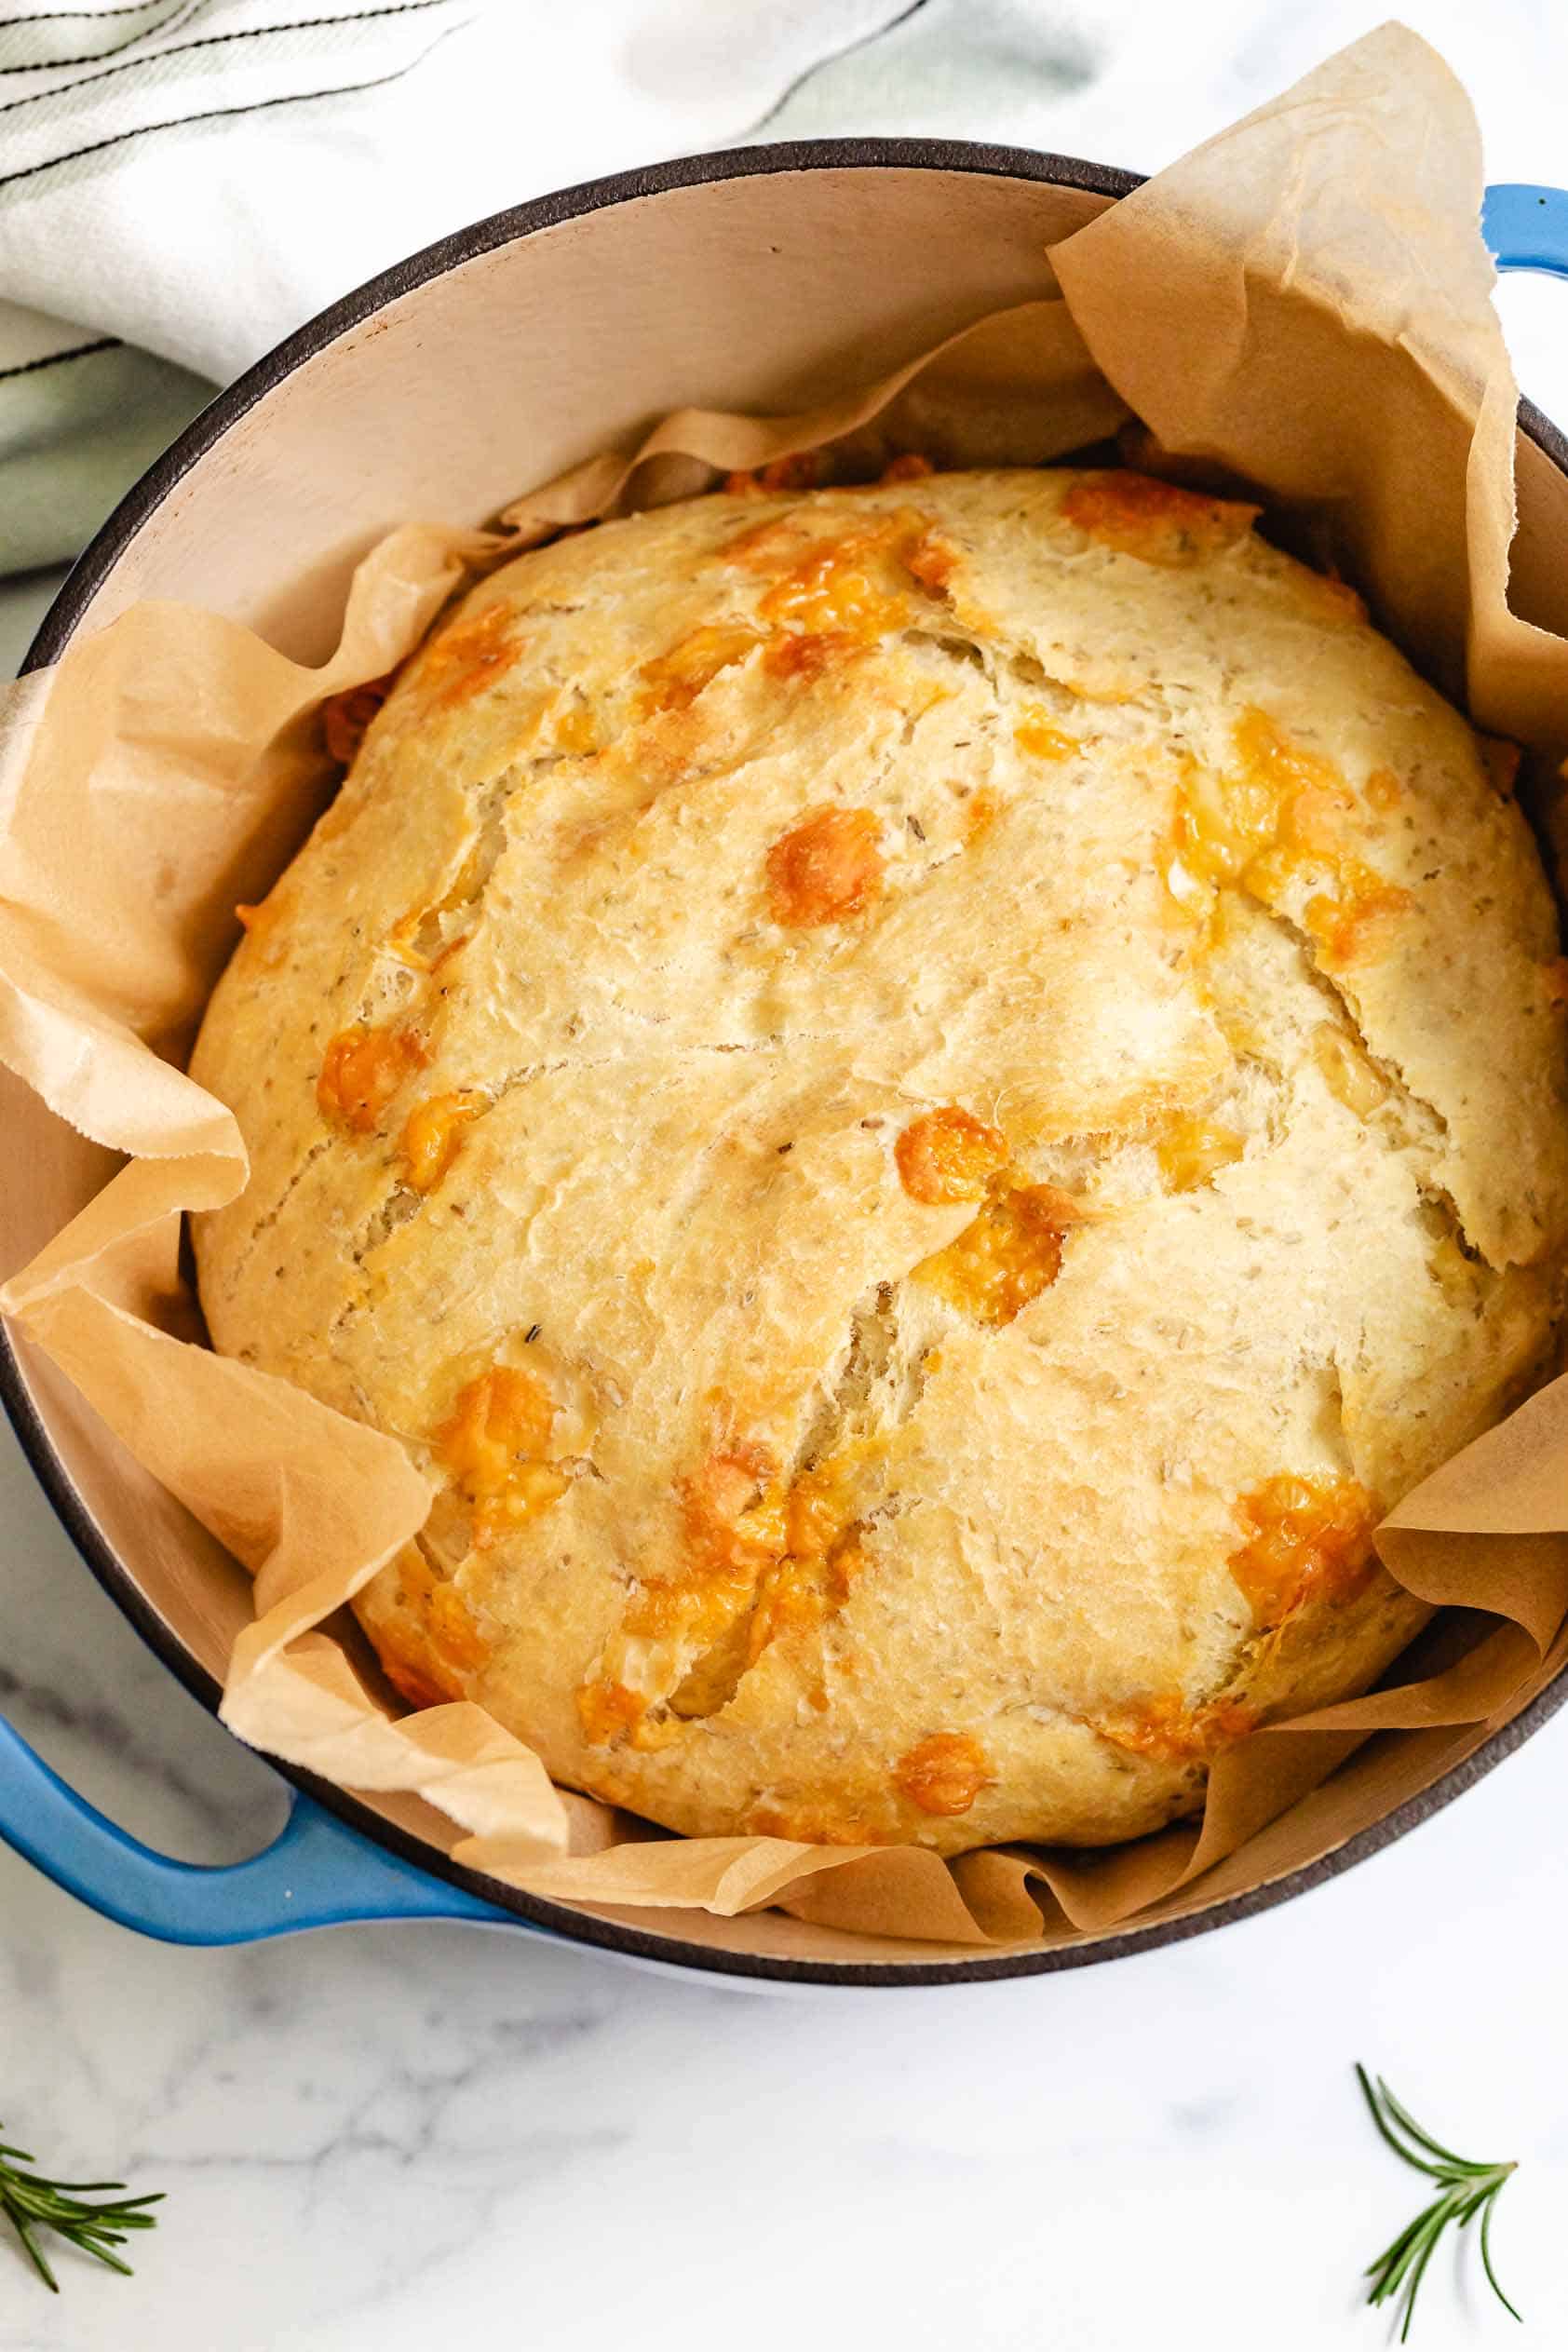
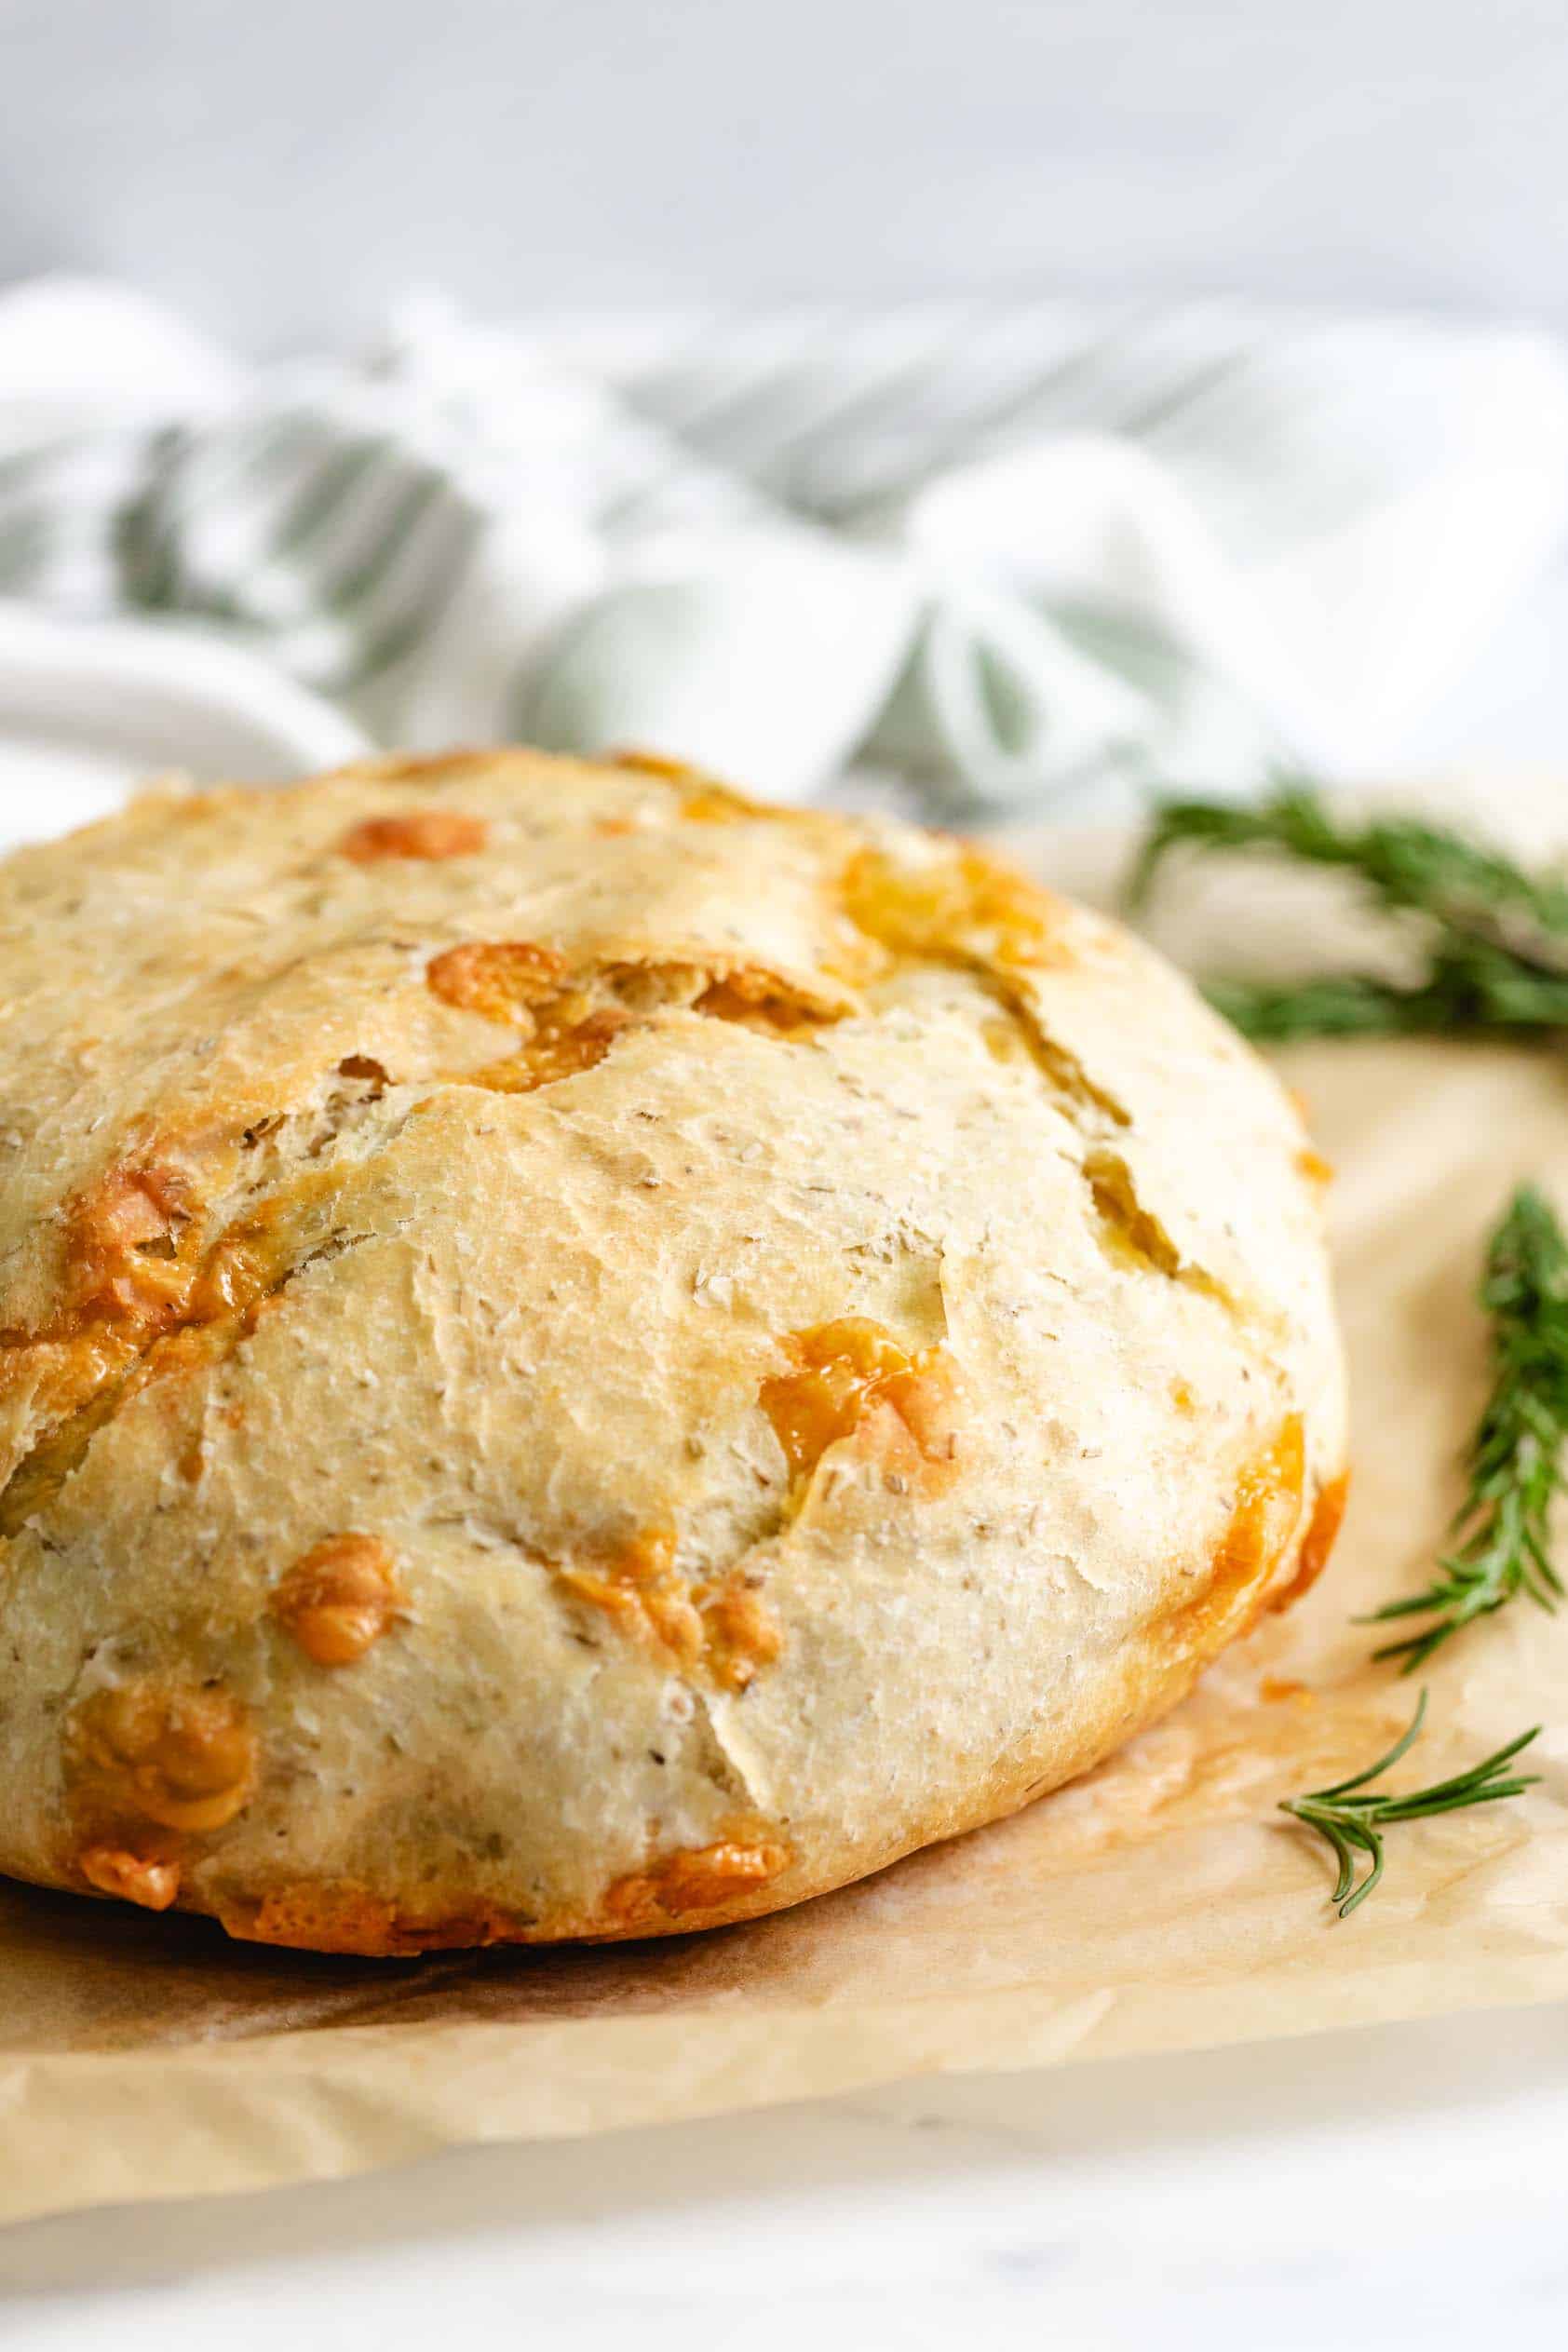
This rustic Dutch oven rosemary parmesan bread is one of my all-time favorite bread recipes, and judging by how popular it’s been over the years, I know I’m not alone.
The combination of parmesan and rosemary gives this loaf a depth of flavor that pairs beautifully with just about any meal. Plus, the smell of it baking? Absolutely heavenly.
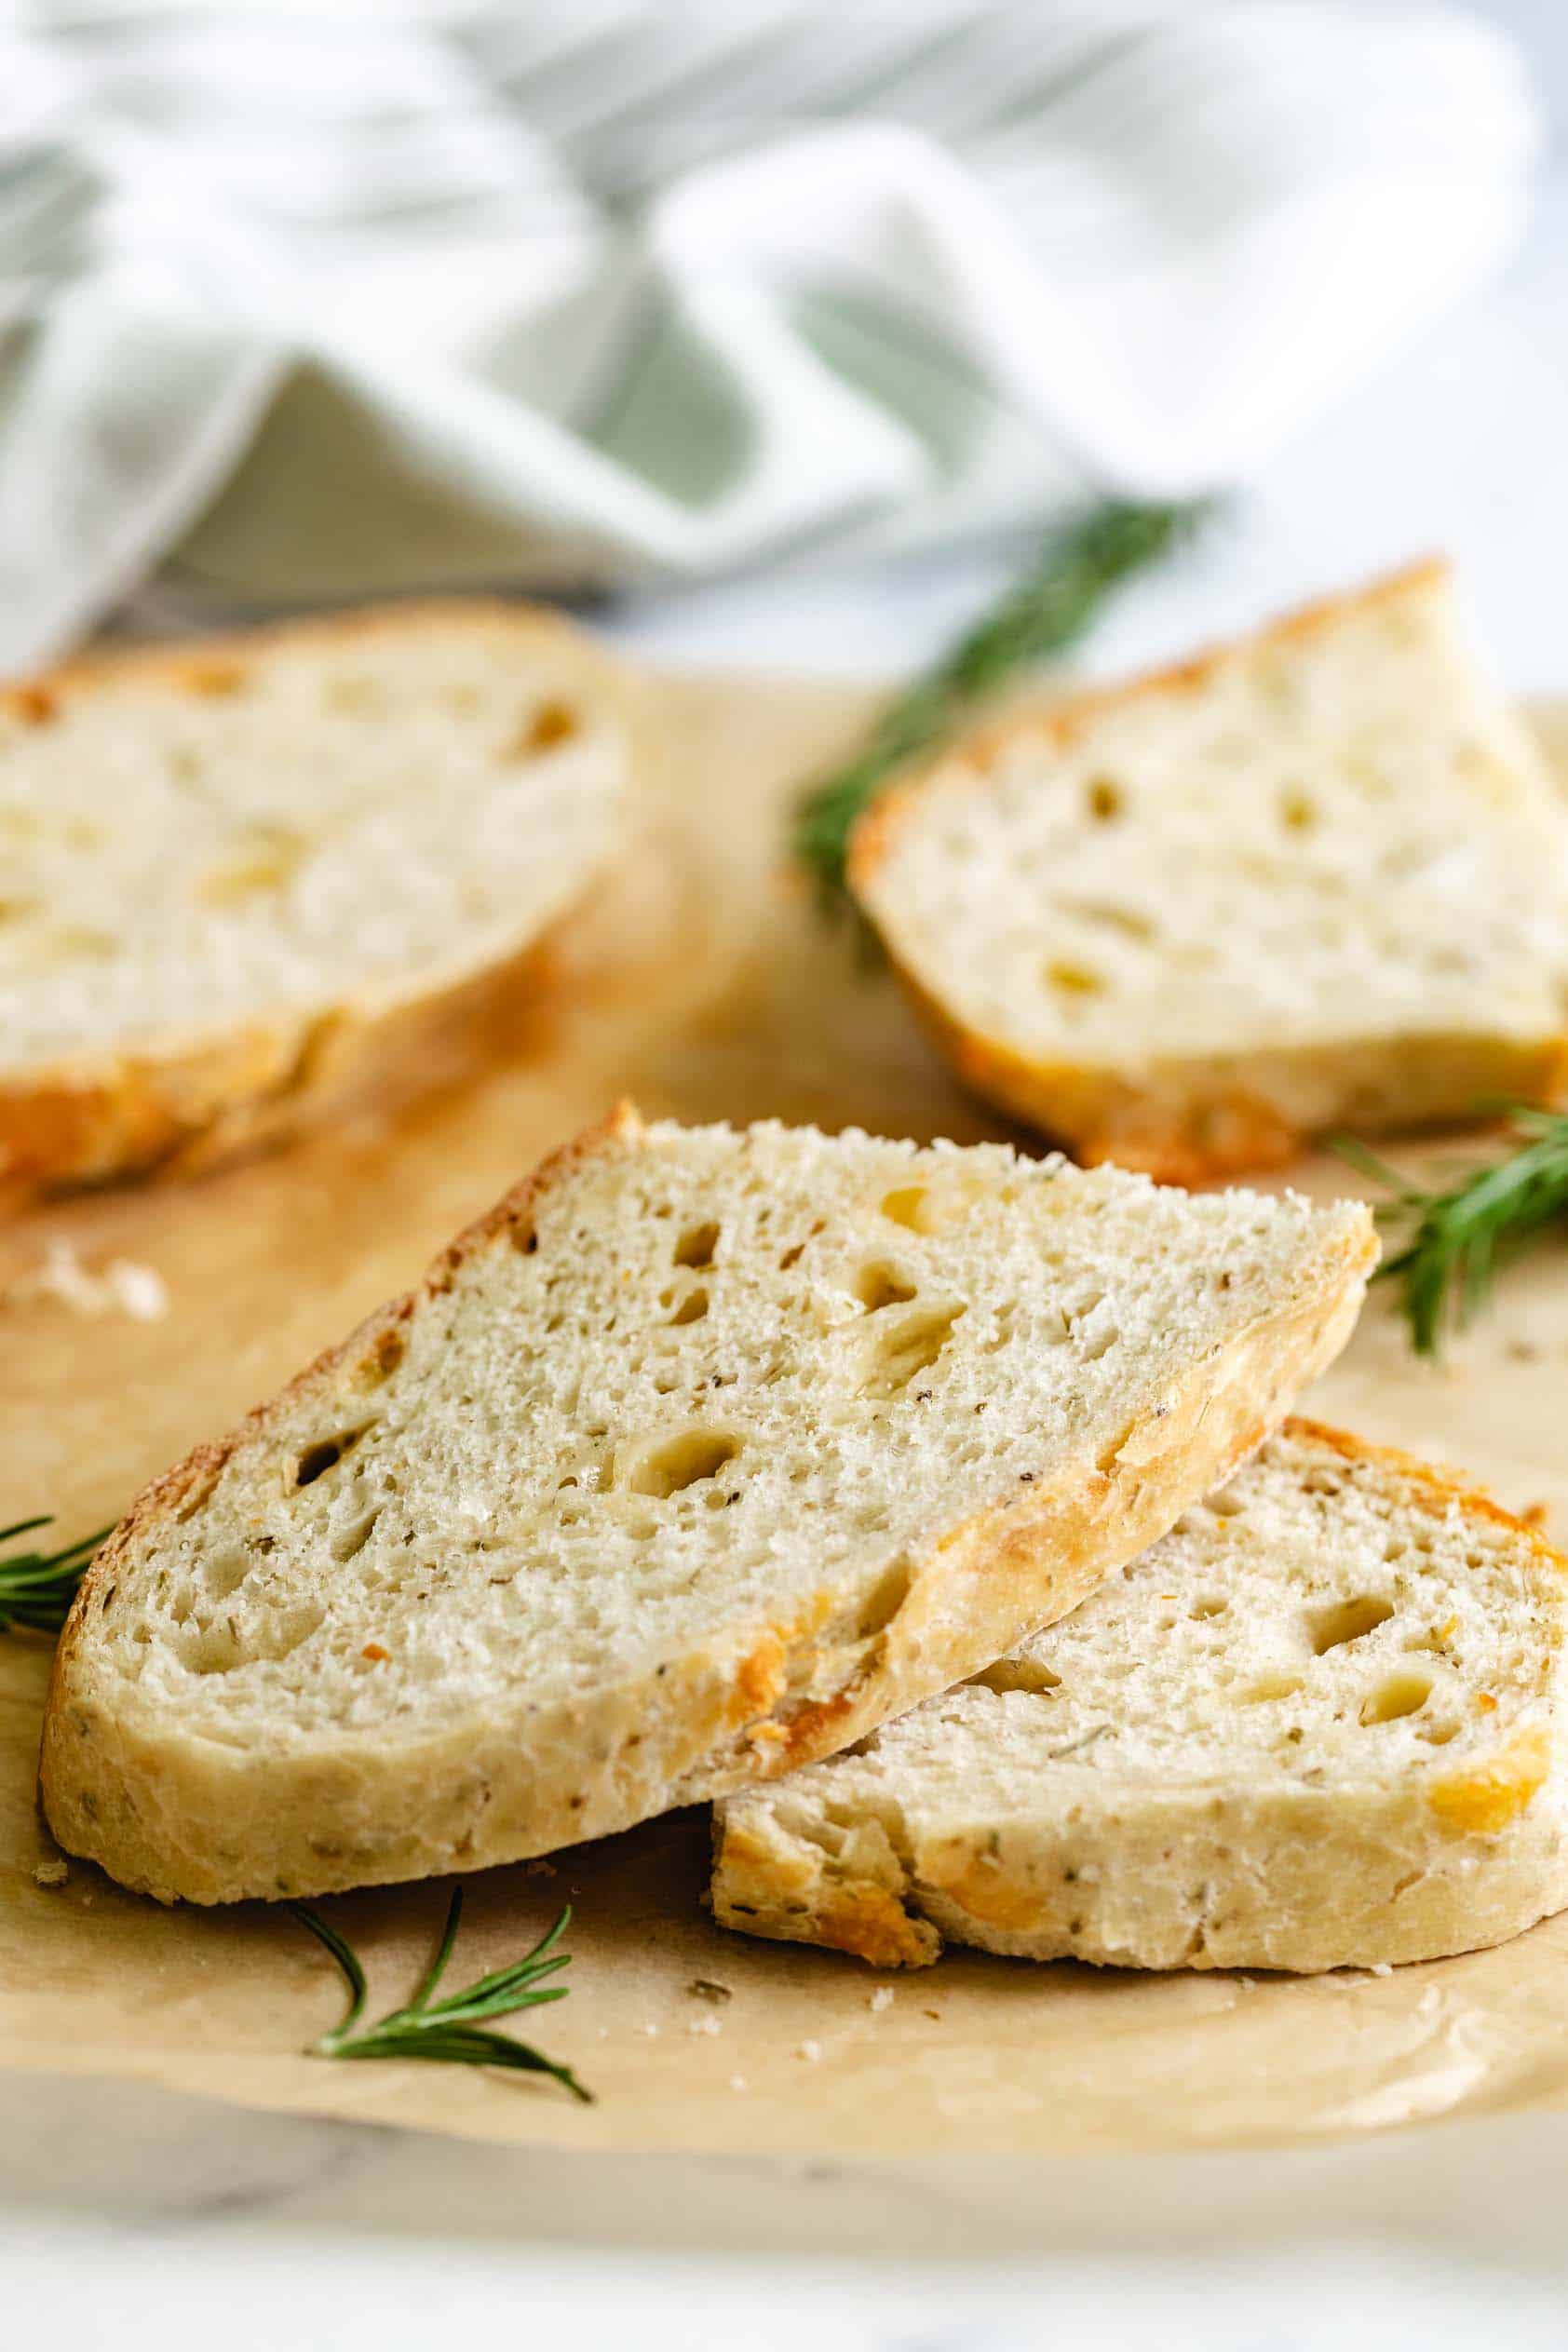
This no-fuss, rustic loaf is simple yet impressive, looking and tasting like it came from an artisan bakery. The parmesan melts into the dough, creating little pockets of rich, buttery flavor which tastes amazing.
It can be enjoyed on its own, dipped in seasoned olive oil, or paired with a helping of pizza pasta, cheesy potato soup, or beef stew.
How to Make Rosemary Parmesan Bread
This bread is easier than it looks! Just follow these simple steps:
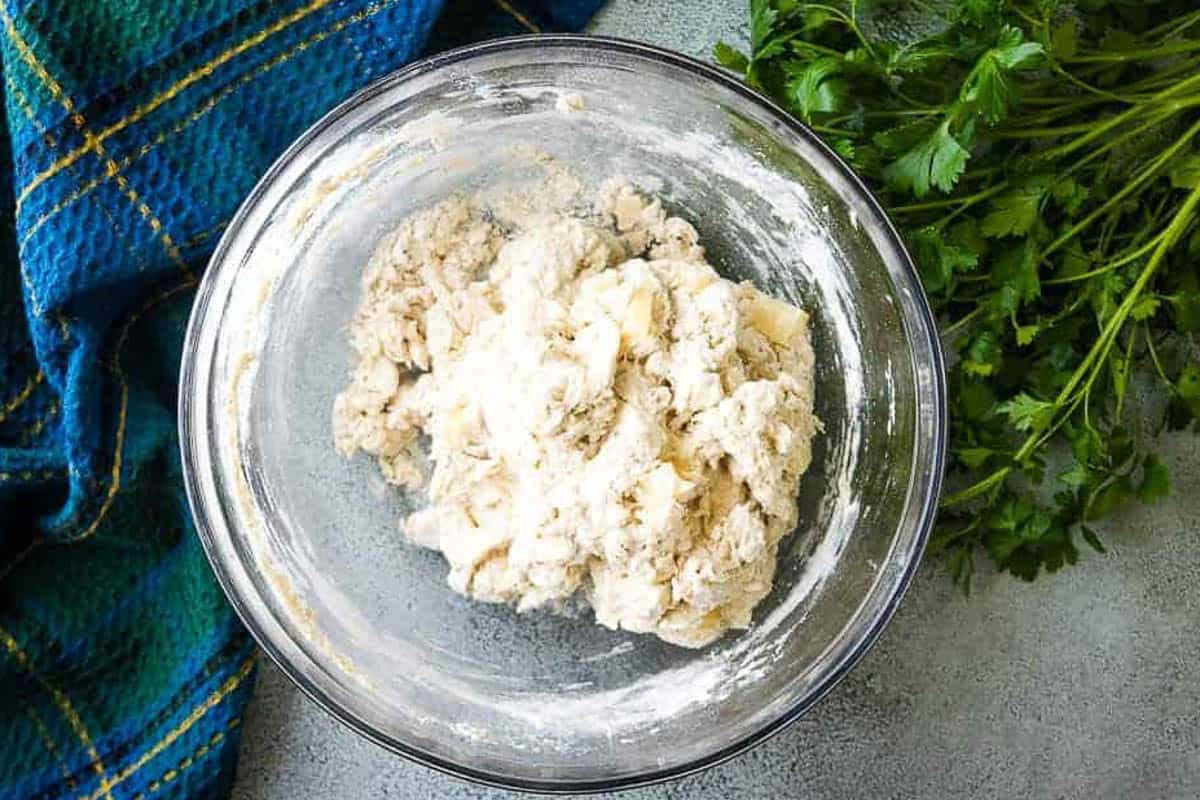
Mix the Dough: Combine the warm water and yeast in a bowl, and let it sit until foamy. Stir in the flour, salt, rosemary, and parmesan, then mix until a shaggy dough forms.
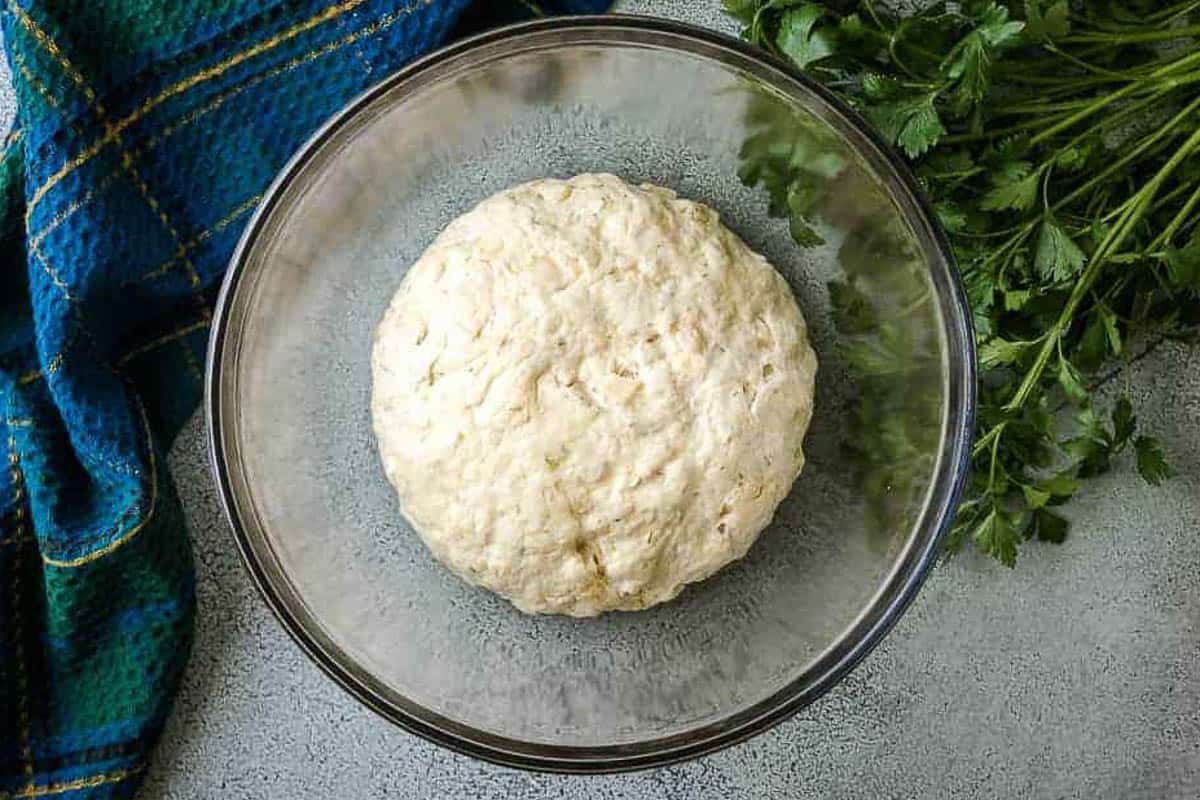
Knead and Proof: Knead the dough until it’s smooth and elastic. Let it rise in a warm place until doubled in size.
Shape and Second Rise: Gently shape the dough into a ball, then let it rise again while the Dutch oven preheats.
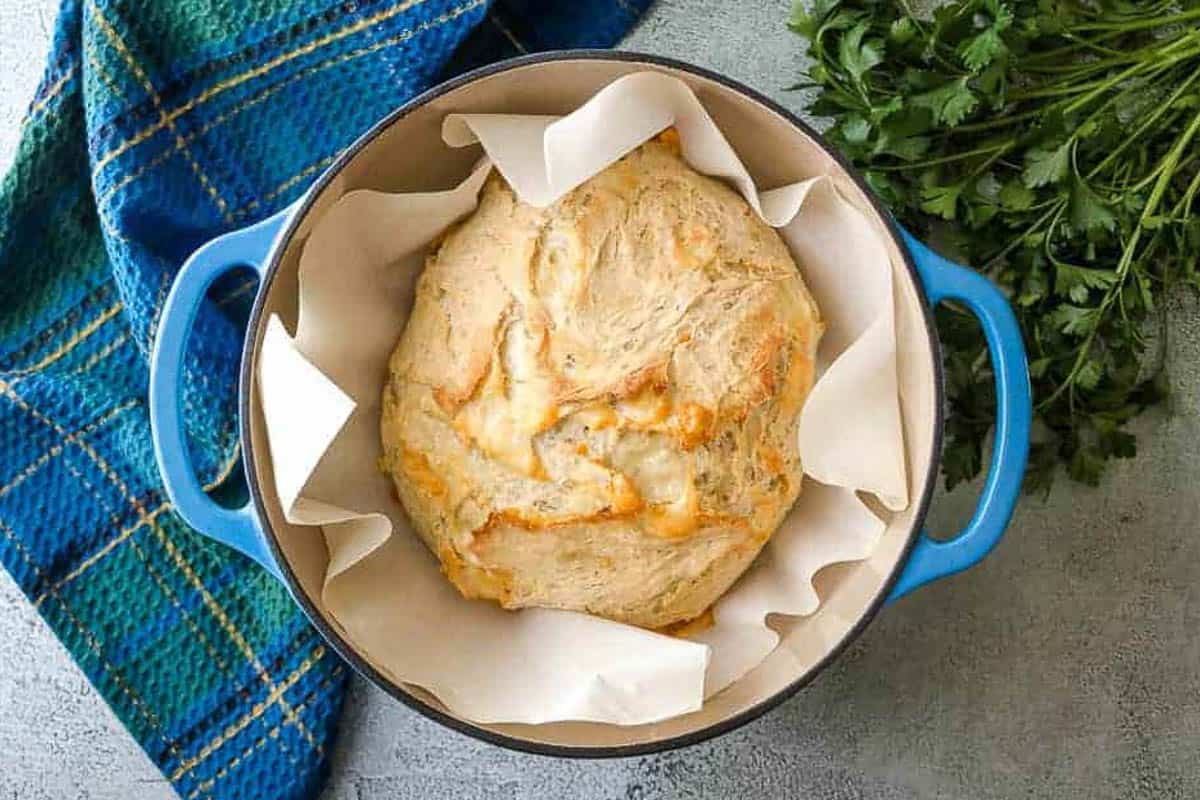
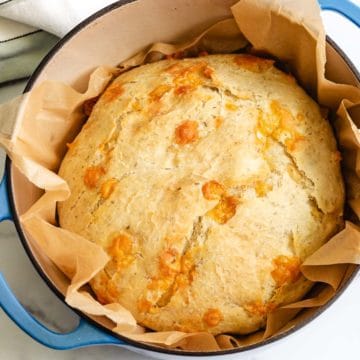
Bake in a Dutch Oven: Transfer the dough onto parchment paper, score the top, and bake in the preheated Dutch oven.
Cool and Enjoy: Let the bread cool completely before slicing for the best texture.
Tips for the Perfect Loaf
Perfecting the Dough
- The dough should be slightly tacky but manageable. If it’s too sticky, add flour one tablespoon at a time.
- Adding extra cheese sounds like a great idea in theory, but too much cheese can cause the bread not to bake properly and/or not to rise.
Baking Tips
- Preheat Your Dutch Oven – A hot Dutch oven creates a steamy environment for a crusty exterior. This step is optional, but I’ve found that it’s makes a difference in the outcome.
- Scoring the Bread – This is also optional, but a slash on top helps the bread expand beautifully while baking.
- Checking for Doneness – Tap the bottom of the loaf; if it sounds hollow, it’s done!
- Cool Before Slicing – Let the bread cool for at least 1-2 hours before cutting into it to prevent a gummy texture.
Can I Use Shredded Parmesan Instead of Cubed?
Absolutely! Shredded parmesan melts beautifully into the dough. If using shredded, measure by weight to maintain the correct cheese-to-dough ratio.
Can I Make This in a Stand Mixer?
Yes! You can use a stand mixer fitted with a dough hook to mix and knead the dough. Start on low speed until the ingredients are combined, then increase to medium and knead for about 5 minutes until the dough is smooth and elastic.
Can I Make This in a Bread Machine?
We haven’t tested it in a bread machine, and results may vary. If you decide to try it, be prepared to adjust the ingredient proportions and cycle settings.
How to Store Leftover Bread
- Room Temperature: Store in a plastic bag or airtight container for up to 3 days.
- Refrigerator: We don’t recommend refrigerating, as it can dry out the bread.
- Freezing: Wrap the cooled bread tightly in plastic wrap, then in aluminum foil. Freeze for up to 2 months. Thaw at room temperature before reheating. If possible, slice the bread into individual slices before freezing.
More Bread Recipes:
Like this recipe?
We’d love it if you would leave a 5 Star ⭐️⭐️⭐️⭐️⭐️ rating and comment below!
How to Video
What You’ll Need
- 1 ½ cups water, warmed to 110 to 115°F
- 1 tablespoon instant yeast
- 2 cups bread flour
- 2 to 3 cups all-purpose flour
- 1 ½ tablespoons dried rosemary
- 1 teaspoon salt
- 1 cup parmesan cheese, finely cubed
How to Make It
Mix the Dough:
- In a large mixing bowl, combine warm water and yeast. Let sit until foamy.1 tablespoon instant yeast1 ½ cups water
- Add bread flour, 2 cups all-purpose flour, rosemary, salt, and parmesan.2 cups bread flour2 to 3 cups all-purpose flour1 ½ tablespoons dried rosemary1 teaspoon salt1 cup parmesan cheese
- Stir with a sturdy spoon until a shaggy dough forms.
- If the dough is too sticky, add additional all-purpose flour, 1 tablespoon at a time, until slightly tacky but manageable.
Knead and Proof:
- Turn the dough onto a lightly floured surface and knead by hand for about 8-10 minutes until smooth and elastic.
- If the dough remains overly sticky, continue adding small amounts of flour until tacky.
- Shape the dough into a ball and place it in a lightly oiled bowl.
- Cover and let rise in a warm, draft-free area until doubled in size, about 30 minutes to 2 hours.
Shape and Second Rise:
- Transfer the risen dough to a lightly floured surface.
- Shape it into a tight ball, tucking in any loose parmesan cubes.
- Place it on a large piece of parchment paper and let it rest while preheating the Dutch oven.
Preheat the Dutch Oven:
- Place a Dutch oven with its lid inside the oven.
- Preheat to 450°F while the dough rests.
Bake in a Dutch Oven:
- Using pot holders, carefully lower the parchment paper and dough into the hot Dutch oven.
- Cover with the lid and reduce the oven temperature to 400°F.
- Bake for 40 minutes. Remove the lid and bake for another 15-20 minutes until golden brown.
Cool and Enjoy:
- Transfer the bread to a wire rack. Let it cool completely before slicing for the best texture.
Can I use gluten free flour instead of All Purpose Flour?
Good morning, Jasmine, that’s a good question. We’ve never tried it with gluten-free flour, so I’m not certain it would work. However, you’re welcome to give it a try. Have a wonderful day 🙂
if its a bread recipe and it doesnt use gluten free flour… its not gonna work like look up a gluten free recipe??? not everything is about you and thats okay !!! they have gluten free recipes !!! they do exist !!
Can I freeze this bread after I make it?
Hi Sue!
Yes, you can! It freezes for about 2 months before the flavor and texture begin to diminish. Hope that helps. Have a wonderful evening! 🙂
Hi, I’ve made this bread a number of times and love it! If you wanted the bread to be taller (for making sandwiches) could you double the recipe?
Hi Melissa!
We’re so glad you love the recipe! Doubling the recipe might work. Another option that may work well is using a loaf pan. If you’re able to easily form the dough into a cylinder shape and place it into a 9×5-inch greased loaf pan, the sides should give the bread something to press against and “crawl” up. That may give it more height. Hopefully one of those methods will work. Have a fantastic weekend! 🙂
I have made this bread a bunch of times, and everyone who has tried it loves it. I changed it up a bit recently using basil instead of Rosemary, and added minced garlic and sundried tomatoes. OMG so good!!!
Thank you for this wonderful recipe! It is delicious and I will most definitely make it again!!
Thanks so much, Vicki! We’re glad you enjoyed it. This bread is one of our favorites! Have a wonderful week! 🙂
What if I don’t have the dutch oven? Is it absolutely necessary? Thank you for the great recipe!
Hi Sara!
This bread can be made on a pizza stone (the bottom of the bread may get crunchy) or baking sheet. Since it’s not enclosed in a Dutch oven, the interior may have a slightly different texture. It will still be tasty! 🙂 Hope this helps. Have a great week!
Can you use regular yeast and just proof it in the water first
Hi Dorothy!
Yes, you sure can! 🙂
@Kim, thanks
You’re welcome! Have a great weekend!
@Kim, my Dutch oven is small!! And it’s currently in the oven, I hope the bread will be okay ? 😩
@Emily I hope everything turned out okay 🙂 Let us know how if ran into any issues. John-Co-owner More than Meat and Potatoes & Berly’s Kitchen
Made two today! One for my family and one to take to a get together. It was simple and delicious. Thanks for the recipe.
That’s wonderful Sandra, we hope everyone enjoyed the bread. Have a lovely day 🙂
Can you use fresh Rosemary?
Hi Debbie!
Yes, absolutely! Fresh rosemary would taste great in this recipe. 🙂 I’d recommend increasing the amount quite a bit to get the same flavor. The ratio is usually 1 tablespoon of fresh for every 1 teaspoon of dried.
Can I prepare the dough and bake later? If so how do I store the dough until I’m ready to bake?
Hi Allie!
We’ve never tried to prepare the dough and save it with this specific recipe. However, on other recipes (not published on the site) I’ve made the dough, placed it in a large glass bowl, covered it with plastic wrap, and placed it in the fridge for 2 to 3 days. This would be while it should be rising at room temperature but instead it will develop flavor and complete a cold rise in the refrigerator. Then, take it out when you’re ready to bake it, and shape it while it’s cold. Bake as written in the recipe. Again, we haven’t tried it, but it may work. Hope that helps! 🙂
I made this today, so easy and it’s absolutely delicious!! Thanks for the recipe!
Hi Gayle!
We’re so happy you enjoyed the bread! Thanks so much for giving it a try. We hope you have a lovely week! 🙂
Loved this so much I wrote a blog about it.
Easy to make! I topped with olive oil and a sprinkle of italian seasoning & garlic powder.